Showing posts with label recipe. Show all posts

April 9, 2012

Chocolate Cupcakes and Risk

For one of my classes, I had to design a survey about anything I wanted and administer it to at least twenty people. So I decided to ask people about cupcakes. The incentive was that I would make the winning cupcake and bring it to class. Part of the homework was to make a powerpoint about our survey and be prepared to present it. Really, I just had an itch to make something, so this become my excuse.


Though I was not chosen to present, I did make cupcakes for the class. Here's the takeaway: people have really boring cupcake preferences. My survey split up cake preferences and frosting preferences, which dilutes the power of the whole cupcake. Having frosting and cake split like that makes it difficult to convince people of the deliciousness of more unusual cupcakes. Thus, my colleagues chose chocolate cake and chocolate frosting. I dutifully made them, wishing that the mint julep cupcake had won instead.


What I've derived from this assignment is that creativity probably can't be managed by democracy. Whether it's cake, cookies, or art, I suspect that people are open to new things, but only when they are completed. The audience needs to be convinced. If your product is conventional, this process is pretty easy. But if your product is beyond the norm (avant-garde art or sazerac cupcakes), the audience needs to be sold. If I had asked people if they were interested in a mint julep cupcake, I may have gotten more positive responses that I did by asking if people were interested in bourbon cake and mint frosting. My my audience isn't as risk-averse as my survey indicates.


So how do creative people get funding for their work when there's this conventional, risk-averse bias? After all, conventional wisdom is often wrong. Having a whole vision and being able to communicate it definitely helps. Crowd funders like Kickstarter can also funnel cash towards artists whose work wouldn't get funding from traditional sources. But there are artists out there who are doing visionary work, and the crowd's lack of interest doesn't make the work any less great. How can they get support? Will the starving visionary always be with us? How can an artist convince the market to take a risk, especially in our fractured culture?


I don't know. But in the meantime, I can make the best chocolate chocolate cupcake possible. I will save my boozy adventure cupcakes for another day. My recipe follows. The cake is from Orangette, the frosting is the recipe is adapted from inside the Baker's Chocolate box.


Cake Ingredients:


3 oz semisweet chocolate
1 ½ cups hot brewed coffee
3 cups sugar
2 ½ cups unbleached all-purpose flour
1 ½ cups unsweetened cocoa powder
2 tsp baking soda
¾ tsp baking powder
1 ¼ tsp salt
3 large eggs
¾ cup canola oil
1 ½ cups buttermilk
¾ tsp pure vanilla extract


Cake Directions:

Preheat the oven to 300 degrees. Line a muffin tin with paper liners.

Pour the hot coffee over the chocolate and stir until melted. Beat the eggs for 3 minutes or so, until they are lemon colored and a little foamy. Slowly add the oil, buttermilk, vanilla, and melted chocolate to the eggs and beat until completely combined. Add all the dry ingredients (sugar, flour, cocoa, baking soda and baking powder), and beat until smooth. The batter will be quite liquidy.

Fill cupcake liners 2/3 of the way full. Bake for 20-25 minutes. Remove from pan and let cool completely. Recipe makes 36-40 cupcakes. These came out quite flat on top, and very moist. If you want a more domed cupcake, I would consider raising the oven temperature and cooking for less time.

Frosting Ingredients:

4 oz unsweetened chocolate
1 stick (1/2 cup) butter, softened
1/2 to 1 lb powdered sugar
1/3 cup milk
1 t vanilla

Frosting Directions:

Melt the chocolate in a large saucepan on the stove. Let it cool for 5 minutes, then beat in the butter, sugar and vanilla with an electric mixer. You need at least half a pound of sugar. If you want sweeter frosting, use more. The more sugar you use, the more frosting you will get. Beat in the milk bit by bit, until you get the desired consistency, which should be smooth and a light brown color. The amount of milk will vary by the amount of sugar.

Cheater's Frosting Directions: 

Melt the chocolate and butter together in a saucepan over low heat on the stove. Whisk in the vanilla and sugar, adding milk to thin it out to the right color and smoothness. I like this method because less gets dirty.

Using a knife or a spatula, frost cupcakes. With the half pound version, there will be enough for each cupcake to get nice layer. If you like loads of frosting (I don't), you'll have to make the sweeter version, or more of the semi-sweet version.


And my powerpoint, should you be interested:
Cupcakes                                                                                            

February 24, 2012

King Cake and Homesickness

It is no longer king cake season. King cakes may only be eaten between January 6 (the epiphany) and Mardi Gras day. Let me get that out of the way. With that disclaimer, let's get down to it.


I lived in New Orleans for 6.5 years of my adult life. I've lived lots of places over the years, but New Orleans feels like home for me. It felt that way my first day, and again when I went back for Mardi Gras this past week.

What amazed me this time is how my experience of the city has changed. I went to Tulane for undergrad, and for at least 3 of those years, my experience of New Orleans was fairly superficial. I went out, but I wasn't a local, or even really a legitimate resident. A big part of that is the nature of college. The whole point of the college experience is to separate young people from their families and home culture for a time while they learn (hopefully) to grow up. Which isn't conducive to embedding yourself in a place. That happens after.

Katrina hit when I was 21. It still reverberates through my life, and the lessons I learned during that time have guided my choices, for better and for worse. I moved back for two years when I was 25. My second stint in New Orleans was in many ways richer than my first. Most of the people I had known were gone, and I made an entirely new set of friends. I didn't work regularly during those two years; the job market isn't that great, and I had no idea what to do with myself. Instead I spent my time working temp jobs and restaurant jobs while I figured myself out. Everyone should do that, preferably when they're young and being broke doesn't hurt as much.

Moving to Boston has been great in many ways. The Gentleman in Question lives nearby, I have some awesome friends, school is going reasonably well, and I'm on a roller derby team. But it doesn't feel like home yet. I made myself a king cake for carnival season, because homesickness required one, but the budget wouldn't allow shipping one. It costs somewhere around $40 to ship a king cake, and they're not very good when stale. Better to make my own. So here's John Besh's recipe, to keep in your back pocket for next carnival season.

Cake Ingredients:
1 cup warm water
1/2 cup sugar
2 tablespoons dry yeast (I used two packets)
3 3/4 cup flour
1 cup melted butter
5 egg yolks, beaten
1 teaspoon vanilla
1 teaspoon lemon zest
3 teaspoons cinnamon
grated nutmeg ( as much as you want)

Icing Ingredients:
2 cups powdered sugar
1 teaspoon lemon juice
milk
purple, green, and yellow sugar (Purple is hard to find. Use food coloring to make it)
plastic baby, or a bean if going out is too much bother
 
Directions:
Whisk together the water, sugar, yeast, and a tablespoon of the flour. Wait for it to get foamy (only a few minutes), then whisk in butter, eggs, vanilla, and lemon zest. Fold in the flour, cinnamon, and nutmeg. Once the dough comes together, take it out of the bowl and knead it for 15 minutes on a flat surface. The dough will feel very oily because of all the butter. Embrace your inner Paula Dean.

Put the dough back in a bowl and cover with plastic wrap. Let it rise for 1-2 hours, until it's about double in size. Punch it down, then remove it from the bowl and roll it out to a large rectangle. You have options here. You can spread some filling on top (popular versions are cream cheese, cherry, and pecan. I used homemade jam), and roll it up like a cinnamon roll, only instead of slicing mash the two ends together. Alternatively, you can do what Besh suggests and cut the rectangle into three strips and braid them together, mashing the ends together. Either way, the goal is to form the dough into a ring.

Preheat the oven to 375 degrees, and let your ring rise for 30 minutes. Bake in the oven for 20 minutes. Besh suggests 30, but mine was done between 15 and 20. Cool the cake completely.

Make the icing by combining the sugar, lemon juice and milk. The icing should be quite thick, so add the milk a tablespoon at a time until you get the texture you want. Insert the baby in the bottom of the cake, then smear the icing all over the cake (which if you're smart you've put on a lined platter/cookie sheet). Top with colored sugars.

Ta Da! Also, fair warning, this cake is ENORMOUS. It takes up one full sized cookie sheet. I tried to halve the recipe, and it wasn't as good. It's hard to figure out how to halve an odd number of egg yolks. So embrace the epic amount of king cake, and make your friends help you eat it. That's the point of it, to share good times with people you like, or at the very least civilly tolerate.

January 21, 2012

Gumbo Methodology

Now that I live in the frozen, yet unsnowy north, I have to make gumbo if I want it. I learned this lesson in New Jersey, where I would see gumbo on the menu and foolishly order it. People seem to think it's the same thing as soup. And while soup is good, it serves a different purpose than gumbo. I've been making versions of this since late 2006, and I like my way because it's more of a method than a recipe. I use it to clear out the fridge of vegetables on the edge.

Traditionalists would be appalled, but I don't much care. To my thinking, gumbo really only requires a few elements to be legitimate: roux, either okra or file, and the trinity of celery, onion, and green pepper. Everything else is negotiable. I also use an unconventional method to make roux, stolen from Alton Brown. He makes it in the oven to prevent burning, which I think is genius. It takes longer, but is foolproof.

The gumbo method is: make roux, cook vegetables in roux, add liquid, add meat, finish with a secondary thickener. There are many varieties, including a tomato based version, and versions without meat. There's a lot of room to play around. Just remember, if someone serves you a gumbo that isn't thickened, then they're cheating.

Ingredients:

Roux:
1/2 cup flour
1/2 cup fat (oil or melted butter, your choice)

Vegetables:
1 medium onion, chopped
2-3 stalks celery, chopped
1 green pepper, chopped
Other random vegetables (greens are an excellent choice, but you can use anything)
Creole seasoning
Thyme
1 quart chicken stock

Meat (any or all, or none, as you prefer):
1 chopped chicken breast
2 links andouille
1 lb shrimp

Secondary Thickener:
1/2 lb sliced okra OR 1 tablespoon file powder (never both)

Directions:

To make the roux, whisk together the flour and fat in an oven safe pot. Bake in an oven at 350 for 1 to 1.5 hours, stirring once every 30 minutes. Color is the most important thing here, it should have a walnuty color or darker. You may need longer to achieve it.

Once the roux is done, move the pot to the stove on medium heat. Add your vegetables and stir them. Stir in creole seasoning and thyme to taste. It shouldn't be very spicy, but have a lot of flavor. Cook vegetables and seasoning for a few minutes, until the onions are soft. Add the chicken stock and stir. Once it boils, reduce heat to a simmer.

If you're using chicken or sausage, brown those meats in a separate pan and add them to the pot. That keeps the gumbo from getting greasy. If you're using shrimp, add them 15-20 minutes before you plan to serve your gumbo.

If using okra, add it now. You'll need to cook your gumbo for at least an hour after this, until the okra is no longer slimy.

If using file, stir in 1 tablespoon 15 minutes before serving.

Serve over rice, with hot sauce on the side. Crystal is best, but Tabasco is usually all that's available. The texture should be somewhere between soup and gravy.


January 15, 2012

Bourbon Bacon Jam

I'm still on break, so I've been doing some fairly ridiculous and/or hardcore things. Roller derby for one. I joined NH Roller Derby. I get drafted onto a team at the end of the month, which is super exciting! I've also taken the opportunity to spend more time with the Gentleman in Question.

Thursday, he presented me with a truly ridiculous idea: spreadable bacon. He'd eaten it over Thanksgiving at a friend's house, and even had a recipe. So obviously we had to try it. I've made a few traditional jams before (I'll tell you about the Strawberry Thyme Balsamic jam soon, and maybe the Blueberry Ginger Orange), but the concept of meat jam seemed odd to me. It was the bourbon that convinced me. Last night, we put it together, which was a nice distraction from the Saints loss. Then the Gentleman convinced me to watch The A-Team, cementing the ridiculous trend.

We used this recipe from Serious Eats, with a modification. The Gentleman is partial to shallots, so we substituted a bunch of them for one of the onions. I admit that we didn't really measure that, and eyeballed it instead. Otherwise, we followed the recipe exactly. I have to say, it's delicious. It's savory, and sweet. It'd be good with fried eggs.


Ingredients:


1 1/2 pounds bacon (nothing fancy, just ordinary bacon)
1 medium onion, diced
4-5 large shallots (equal approximately to the size of the onion), diced
3 medium cloves garlic, diced
1/2 cup cider vinegar
1/4 cup maple syrup (use grade B for a strong maple flavor)
6 tablespoons coffee
6 tablespoons bourbon
1/2 cup packed dark brown sugar

Directions:


Chop the bacon into 1 inch pieces, and cook in a skillet until just crisp. You will probably need two skillets, or have to do this step in batches. Unless you have a giant cast iron skillet of doom, like the Gentleman.

Remove the bacon and drain it on a paper towel (which you've smartly layered on top of some tin foil to keep your counters from getting greasy). Pour off all but 1 tablespoon of the bacon fat. Sauté the onion, shallot, and garlic in the bacon fat until the onion is soft. 5-10ish minutes should do it.

Pour in the vinegar, syrup, coffee, bourbon, and sugar. Stir vigorously, and scrape up any bits that are stuck to the pan. Bring it to a boil (shouldn't take long), then boil it for 2 minutes. Add the bacon back in and give it a nice stir.

Move the whole mix to a crockpot, and cook on high uncovered for 3 1/2 to 4 hours. Ours only took 3 1/2. You can cook it less if you want a more jammy texture, or put the cover on.


Move the whole mix again to a food processor, or a blender, or a chintzy supermarket chopper, and pulse a few times until the mix is chopped into a paste. Put your bacon spread into clean canning jars and store in the fridge. We got about 16oz of spread.
And 8 oz of bacon grease.

October 15, 2011

My Devious Plan to get a New Oven

Well. It's been a while, I see. Whoops. So. How to sum up the past few months before we move onto the important thing, namely cake and new ovens? The best way to describe my summer is that involved a lot of pizza and a lot of roller derby, as I worked in two different pizza joints and worked hard on my skating. Big Easy Rollergirls taught me everything I know about skating and made my last year in New Orleans amazing! I spent a lot time with my friends, especially my wolf pack, and became a regular at Twelve Mile Limit, the best snobby cocktail bar I've come across. But, come August, it was time to move again.

I moved to Boston to start my non-profit management MBA at the Heller School. It's a huge change in identity, and so far it's great! My roommate also lived in New Orleans, and her sister is a friend of mine (before we settled on that, I interviewed some truly weird potential roommates. Maybe I'll tell you about it someday). Going back to school does leave less room for creative pursuits, but I've managed somehow. Soon I'll tell you about the beer brewing in recon room of my apartment, but for now, I'll restrict my comments to the oven situation.

The apartment is lovely, but the kitchen is best described as...dated. The oven and fridge are avocado green, the floor and backsplash tiles are brown. It's 70s-tastic. The oven never worked very well, as the door would only open with a fight, and fell off every so often. The fridge is the antithesis of energy efficient. So really, using the kitchen could be an exercise in slapstick comedy. It all came to a head Thursday night. The Gentleman in Question has a nice round birthday in a few days, and I had promised him cake. After some effort, I had the batter in the pans ready to go, so I opened the oven door. Big mistake. The door came flying off, crazy hot, and crashed to the floor. I couldn't get it back on. The landlord came over, and we discovered the hinges were warped. His wife kindly baked the cake for me, and our oven door is leaning against the door to the porch. As of Thursday night, there was talk of getting a new oven. My roommate is quite pleased with that turn of events, and the Gentleman is scheming a way to get me a new refrigerator.

The cake was totally worth it. The Gentleman requested some combination of chocolate and raspberry, and being an overachiever, I decided to do a checkerboard with those flavors. To get the checkerboard effect, you need a plastic insert. It comes in a kit. There are many options, so investigate. The pans in the kit I linked to are pretty nice. Once you have that essential piece of equipment, the rest is fairly simple. Finding recipes can be tricky, because the two cake flavors need to have similar textures, and bake at the same temperature for the same amount of time. Raspberry cake was an additional challenge. Every recipe involved jello. Which is creepy. Until Smitten Kitchen saved the day, with her adapted Pink Lady Cake recipe. I changed it further, cutting it in half and subbing in raspberries. For the chocolate, I went with this recipe from Joy of Baking, also cut in half. The raspberry flavor shines through, and the chocolate is rich without being too sweet. My cake came out extra dense and not as checkerboardy because of the baking drama, but yours will turn out light and delightful. You'll get three bowls dirty making these cakes, so the mess isn't too bad.

January 19, 2011

Windowpane Cookies


Again, with the apologies. I'm sorry! I've been traveling and applying to graduate school, and thus not blogging. I also didn't have my camera on my travels, so the crafty things I did went unrecorded. Today, I offer up the last of my December cookie project. In coming days, I'll show you a bit of New Orleans, since the Henz will be in town.

But on to the cookies. These are a combination of recipes and concepts. I started with this recipe, but found that I was defeated by the sticky impossible dough. So I tried this one, but kept the candy concept. The dough itself is a dream. Not too sticky, and it results in a nice tender cookie.


Ingredients:

1 cup unsalted butter, softened at room temperature for an hour
1 cup granulated sugar
1 egg
2 ounces cream cheese (1/4 of a standard cream cheese package)
1 teaspoon vanilla extract
3 cups flour
1 1/2 teaspoons baking powder
1/2 teaspoon salt
Jolly Ranchers, unwrapped and crushed

Directions:

Cream together the butter and sugar, then add in the egg and mix until everything is pretty smooth. Add in the cream cheese and vanilla, mixing thoroughly. Then mix in the next three ingredients. Refrigerate the dough for at least an hour, until ready to use.

Preheat the oven to 350, and roll out the dough to 1/8" to 1/4" thickness and cut out cookies. To make the windowpane cookies, use two cutters of the same shape but different sizes. Cut out with the larger one first, then cut out the center of the resulting cookie with the smaller one. Place resulting cookie on lined cookie sheet, then carefully fill the center with the crushed jolly rancher. You don't want the rancher dust to get on the cookie, since it will stain.

Bake cookies for 8 to 12 minutes, depending on thickness, and let cool completely on the cookie sheet. The jolly rancher may look bubbly and weird out of the oven, but don't worry, as it cools it will solidify and smooth out.

December 21, 2010

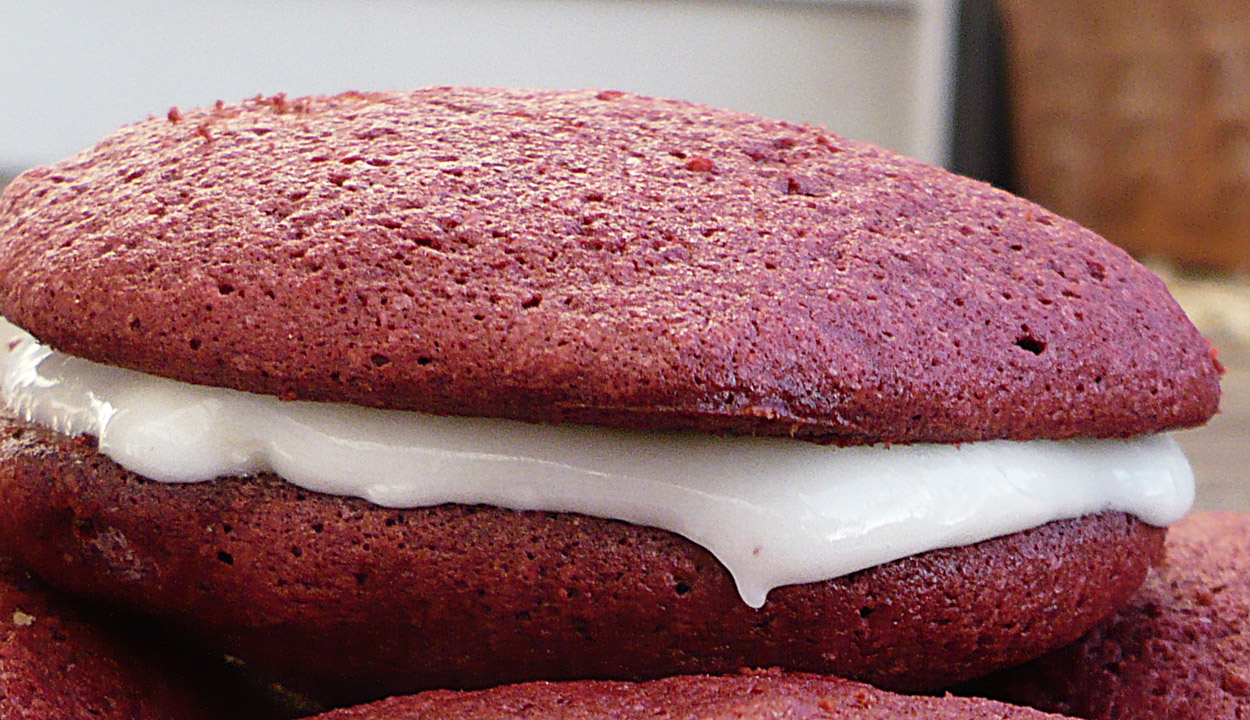
Red Velvet Moon Pies

 Last night was a total Lunar eclipse. It was also the Winter Solstice, a day I look forward to mainly because from now on the days will get longer. My plan for the evening was to go to the Tulane parking deck to watch it. Even though it's brightly lit, the sky was still decently visible. Plus, I love the view up there. You can see clear to downtown, with the lights on the Crescent City Connection and the soft glow of the Superdome. My companions decided to stay in, but it was nice anyway. Very peaceful, at least. Just me, New Orleans, and the red Moon. It was even kind of warm.

But you see, I'd make these cookies in honor of the occasion, and now I had no one to share them with. There are few things better than sharing cookies, so I hightailed it out of there and headed to karaoke at Le Bon Temps (every Monday, if you live in New Orleans, you should go). My friend brought his telescope and set it up outside the bar. So I stood outside with him, his delightful girlfriend, and a bunch of drunks and watched the moon turn a watery red. The cookies were perfect. So was New Orleans, at least for a little bit.

These are easy to make. The batter is pretty liquidy; it resembles cake batter rather than cookie dough. Don't doubt, just roll with it. (Edited to add that I got the recipe here, and only really tweaked the frosting.)

Ingredients:

1/4 cup butter, softened
1 cup sugar
2 eggs
2 tablespoons buttermilk (Or you can cheat and use plain milk and a splash of vinegar)
1 teaspoon vanilla extract
1 tablespoon red food coloring
1 1/3 cups all-purpose flour
4 tablespoons cocoa powder
1 teaspoon baking powder
1/4 teaspoon baking soda
1/2 teaspoon salt

Directions:

Preheat the oven to 375. Cream together the butter and sugar, then add in the eggs. Once it's all creamed nicely, add in the buttermilk, extract, and food coloring. Mix in the dry ingredients in batches, beating thoroughly after each addition.

Drop the batter by tablespoonfuls onto your cookie sheets. Bake for 10-12 minutes, or until the centers look set. Let cool on the sheets for a minute or two, then move to a rack. They might stick a bit; mine did.

While your cookies are cooling, you should make the filling. It's cream cheese frosting. My approach is rather free-form. I'll adjust amounts until I get the right consistency, which in this case is slightly runny. Once you've made the frosting, smear 1 tablespoon (or enough to get a nice layer without it squelching out when you bite into it) of it on a cookie and then slap on another cookie. Sandwich made!

Ingredients:
8 oz cream cheese
1/4 cup butter
1 teaspoon vanilla extract
2ish teaspoons of milk
3 cups powdered sugar

Directions:
Beat together cream cheese and butter, then mix in vanilla. Start adding the powdered sugar bit by bit. Add in milk as needed to keep the frosting smooth. You can add more or less sugar as needed to get the right texture. I don't like really sweet frosting, so I play with the milk content instead. You're going to have a ton extra.

Makes 13ish sandwiches.

December 17, 2010

Linzer Cookies


I bake to relieve stress. This is almost certainly why I gained weight in grad school, but everyone else enjoyed the fruits of my labor, so it was worth it. I bring this up because today was not a good day. My Christmas/New Year's plans were dealt a setback by the Gentleman in Question's company. We've had to change a significant part of our trip to DC, and it was unclear for a bit how this would affect my flights. Several phone calls to the travel website later, and at least one crying fit (sometimes I regress to being a whiny teenager, deal with it), we got it worked out, hopefully for real.

So to deal with the frustration of dealing with online travel companies, I made Linzer Cookies. They are delicious and pretty! The darker ones got a bit overcooked because I was arguing with a travel man on the phone. You should make them. And hopefully while not arguing with customer service representatives.


Ingredients:
2  cups  all-purpose flour (about 9 ounces)
1/2  teaspoon  baking soda
1/4  teaspoon  salt
1/4  teaspoon  ground cinnamon
3/4  cup  granulated sugar
1/2  cup  butter, softened
1/4  cup  egg substitute
1/4  cup  seedless raspberry jam

Directions:
Cream together the butter and sugar. Mix in the egg substitute. Blend in the dry ingredients, adding them slowly. Divide the dough in half and wrap in plastic wrap, flattening it into a disk. Chill at least 1 hour.

Preheat oven to 375 and roll the dough out to 1/8-1/4" thickness. Using a jar or a pint glass, cut out round shapes. Using a smaller cookie cutter, cut out center shapes in half the disks. Re-roll scraps and cut more shapes, until there's none left. Bake for 10 minutes and let cool completely. Spread 1/2 teaspoon of jam on the whole cookies, and place the holey cookies on top, smushing together. Chill in the fridge and eat!

I got 12, but you could get more if you used smaller cutters.

December 9, 2010

Peanut and Chocolate Chip Cookies

Here I present cookie #2 in my December cookie project. I realize they look a lot like cookie #1, but I assure you, they taste completely different. I gave half to Diana, and her response was to offer me anything I wanted in exchange for making her several batches...

They're easy to make. I used this recipe, with no alterations. The only thing I'd do differently is add more chocolate. Also, toasting the peanuts is completely essential. Mine were lightly salted; I'm not sure there are unsalted peanuts in stores anymore.


Ingredients:

1/4  cup  unsalted butter, softened
1/2  cup  granulated sugar
1/2  cup  packed brown sugar
1  teaspoon  vanilla extract
1  large egg
1  cup  all-purpose flour (about 4 1/2 ounces)
1/2  teaspoon  baking powder
1/4  teaspoon  baking soda
1/3  cup  semisweet chocolate chips
1/3  cup  coarsely chopped unsalted, dry-roasted peanuts
1/2  teaspoon  coarse sea salt

Directions:

Preheat the oven to 350, and toast the peanuts on a cookie sheet for 5 minutes. Cream together the butter and sugars, then add the vanilla and egg. Mix thoroughly, then add in the dry ingredients. Once it's all together, stir in the peanuts, chocolate, and extra salt. Drop by spoonfuls on the cookie sheets and bake for 10 minutes. Cool on a wire rack and try not to eat them all. Makes 24 cookies.

December 3, 2010

Cranberry Walnut Chocolate Chip Cookies

Another long pause, I know. I've been traveling a lot. However, I don't want this to turn into a blog about how I don't blog, so instead I'd like to tell you about my project for December: Christmas Cookies. I announced it on Facebook and got some excellent suggestions. A frenzy of googling followed. I found this recipe from Cooking Light and decided to make it, with some changes. These were made December 1st, and turned out pretty well. My friend ate the four I gave her in under a minute. 

A few notes: you should consider upping the cranberry content. They're delightful. The chocolate amount given is somewhat negligible. I'll leave it out next time, since we hardly noticed it.


Ingredients:
5 tablespoons  butter, softened
3/4 cup  packed brown sugar
2 tablespoons  honey
3/4 teaspoon  vanilla extract
2 eggs 1 1/2 cups whole wheat pastry flour
3/4 cup  regular oats
1/2 teaspoon  baking powder
1/4 teaspoon  baking soda
1/4 teaspoon  salt
1/4 cup  dried cranberries
2 1/2 tablespoons  finely chopped walnuts
2 1/2 tablespoons  semisweet chocolate minichips

Directions:
Cream together the butter and sugar. Once it's mixed, add honey, vanilla, and eggs. Mix thoroughly. Add in the rest of the ingredients, mixing well after each addition. (Yes, I know you're supposed to mix the dry stuff together first, and then beat into the butter stuff, but I don't have a dishwasher, and I had enough to wash as it was.) Cover bowl with plastic wrap and let dough rest in the refrigerator overnight.

Preheat oven to 350 degrees. Drop the dough onto the cookie sheet by tablespoon (you should get 36 smallish cookies), and bake for 10 minutes. Let them cool, and try not to eat them all at once.

August 31, 2010

Heavenly Hash

I first heard about this cake from a coworker, and it sounded so good that I decided to make it to bring in to the office. I work for the census, and last Friday was the last day for a lot people, though not for me, and I wanted to do something special for it.

There were things to consider however. As described, the cake was a full sheet cake, and other cake eating instances in the office had shown me that cutting and serving cake could be difficult. In an office without a proper kitchen, the lack of real knives was definitely an obstacle. There was also the plate and fork issue. It seemed simplest to adapt the recipe to cupcakes, which would solve all of these problems in their single serving nature.

And so, I made cake. Heavenly Hash is chocolate cake, a layer of marshmallow, and a layer of dense frosting. While you can cheat and use cake mix for the cake, you can't cheat on the frosting. Canned frosting is only vaguely related to the real thing, and the real thing makes all the difference.

Ingredients:
1 box chocolate cake mix
1 1/3 cup coffee
1/2 cup oil
3 eggs
48 jumbo marshmallows
4 oz unsweetened chocolate
3 cups powdered sugar
1 stick butter
milk

Directions:
Preheat oven to 350 and line muffin tin with cupcake liners. Mix together the cake mix, coffee, oil, and eggs and beat until smooth. Put 1 to 2 tablespoons batter into the cupcake wells, or until they look about a third full. You want to leave room for the marshmallow and the frosting. Bake the cupcakes for 15-20 minutes. It's ok if they're a little underdone.

Remove the cupcakes from the oven, place marshmallow on each one, and put the tin back in the oven for 2 minutes. Remove again, and with a spoon, squish your marshmallows until they cover the cupcakes completely.

Mix up your frosting. Melt the chocolate and the butter together, then beat in the sugar, adding the milk as needed to smooth out the consistency. Top the cupcakes with the frosting, covering them as much as possible.


Note: Sorry about the blurry picture. My camera isn't that great and I'm thinking of getting a new one. Suggestions?

August 15, 2010

Pickles!

Pickles are a polarizing food. Lucky for me every eater currently in my life hates them. I love pickles unabashedly. I always have, ever since I was little. This is something that I share with my dad. I remember him making this sharp smelling concoction of white vinegar, onions, and radishes. He still makes it, though not as often as he did when I was little. I never ate it, since radishes frightened me. I still don't like them. But cucumber pickles, those I loved, in all their forms. Kosher, dill, bread and butter, spears, whole, chips, it doesn't matter. I will eat them.


Another pickle memory: my mom made my lunch for nearly all of my school years, and my lunch usually contained a double bagged dill spear. In high school I played volleyball, and I would come home from practice craving pickles. I'd eat a whole jar in a matter of minutes.

My ex-boyfriend's mother taught me how to make pickles one Easter season. The memory is vague, but I recall us using whole cucumbers packed into large mason jars. We boiled the vinegar, water, salt, and spices, including alum, then poured it over the cucumbers and popped on the jar tops. I don't remember processing them in any way; we just left them on the counter. It was a fun thing to do together. She also taught me how to drive a standard transmission, taking the ex and me out on the Arkansas back roads in an old Jeep Wrangler. I didn't stall out once.

It's a hazy web of memories and feelings, all brought on by pickles. I guess people get this way about things like cake, or cookies, or their grandmother's pot roast. And I love all those things too. But really good pickles make me feel like I'm small again sharing some with my dad.

This recipe makes two batches of pickles, each with its own flavor. The first is a white vinegar base, with a traditional dill seasoning. The second uses cider vinegar and sate seasoning because I was curious.

Ingredients:

2 English cucumbers, sliced and divided
5 whole cloves garlic
1 large shallot, sliced
2 fresh jalapenos, sliced
fresh dill
5 whole cloves garlic

Brine 1:
2 cups white vinegar
2 cups water
1 Tbs kosher salt, divided
1 Tbs pickle seasoning
1 Tbs dill seed

Brine 2:
2 cups apple cider vinegar
2 cups water
1 Tbs kosher salt
1 Tbs sate seasoning

Directions:

In a large saucepan, bring  white vinegar, cups water, and  salt to boil. Add pickling spices and dill.

Arrange the slices of one cucumber, 1 jalapeno, and 1 shallot in a glass bowl or your final container. Pour the boiling brine over the cucumber mix and let cool for one hour.


Repeat recipe with cider vinegar,  water, salt, and sate seasoning. Pour over the other cucumber slices. I added jalapeno to this batch too, removing the seeds to tame the heat a bit.

Taste your brine after it's cooled. If it's too salty, add cold water. The pickles will last about 10 days in the fridge.

June 17, 2010

Minestrone

Or as the roommate dubs it, Italian Trash Soup. The Funk noted that it could also be known as Jersey Shore soup. I think it's soup of people who are marginally employed, yet rich in the realm of frozen vegetables.

It's not the best minestrone I've ever had; that distinction belongs to my dad's college roommate, whose minestrone is a labor of love, taking hours, with carefully balanced proportions of vegetables.

But mine is ready in 30 minutes. So I win?


Ingredients:
4 cups stock
2 cups water
1 14 oz can tomato sauce
1 14 oz can diced tomatoes
10 oz sliced andouille sausage
1 lb dried black beans, soaked
garlic salt
black pepper
Italian seasoning
thyme
paprika
sage
tarragon
coriander
fennel seeds
1 onion, chopped
1 lb frozen peas
1/2 lb frozen corn
1/2 lb frozen green beans
1/2 lb frozen lima beans
1/2 lb short pasta

Directions:
Mix stock, water, tomato products, sausage, and onion together and bring to a boil. Add your spices to taste. Throw in the pasta and cook until just al dente. Then add in your frozen vegetables, and cook until they're ready.

Eat, enjoy, and avoid our mistake of drinking hobo wine at the same time. Which is a story for a different day. Suffice it to say, The Funk is no longer allowed to drink Mad Dog, Steel Reserve, or anything of that ilk in our house.

June 15, 2010

How to separate eggs without a separator.

Use the shells! It's not too hard.

Step 1: Crack the egg, holding one end higher than the other so none of the eggy stuff leaks out.

Step 2: Tip the yolk from one side of the shell to the other. The white should fall away into your bowl.

Step 3: Repeat, until only the yolk remains in your shell.

Done!

June 1, 2010

Chicken Pot Pie


This was shockingly good. It was kind of soupy, but it thickened in the refrigerator. But the flavor was spot on, and I have no complaints. We ate this over the course of a week, and it just kept getting better!

Ingredients:
3 Chicken breasts
1 bag frozen peas
1 onion, chopped
3 cloves garlic, chopped
3 stalks celery, chopped
1/2 bag baby carrots
4 red potatoes, quartered
1 tablespoon olive oil
1 quart chicken stock
1/3 cup flour
1 large puff pastry
Rosemary
Thyme
Sage
Salt
Pepper

Directions:
Place breasts in a baking dish and bake at 350 degrees for 30 minutes. Meanwhile, chop the onion, celery, and carrots. Quarter the potatoes. In a large saucepan, heat the oil and add the onions, garlic, celery, and carrots. Cook, stirring frequently, until the onions are translucent. Add the chicken stock and spice to taste. Bring soup to a boil, and add the potatoes.

When the chicken is done, remove it from the pan and chop it up and set aside. Mix some of the hot chicken stock into the flour, creating a slurry. Mix that slurry back into the soup and stir to mix. Cook on high for 10 minutes total. Pour the soup into a 2 qt pyrex dish, then top with the puff pastry. Be sure to cut some slits in the pastry to vent the steam. Bake at 350 degrees for 30 minutes, or until the pastry is nice and brown.

April 15, 2010

Chocolate Sourdough Cupcakes


It's been a while since I worked 40 hours a week. It's been very easy to come home, sit down, and not move again until bedtime. I've tried to be social, and so far succeeded, but the morning after I inevitably oversleep and have to rush off to work again. My crafting time has seriously dwindled.

And that's my own fault. So, I resolve to make more stuff. In that vein, I present cupcakes. These were made with a purpose in mind. My roommate goes to a weekly potluck/supper club, and offered our house to host it. I decided that my contribution to the evening would be cupcakes, since I only had two hours between work and the start of the event. I'd seen a sourdough chocolate cake recipe and was intrigued, but rejected that particular iteration because it seemed awfully liquidy. But the concept stuck, and a quick Google search yielded this recipe. I didn't make many changes, and the first one was borne of procrastination. You're supposed to leave the starter out for 12 hours or so. Mine sat out for 2 days before I made the cake the day of the potluck.

Sourdough Chocolate Cupcakes

Ingredients:

1 cup thick sourdough starter
1 cup sugar
½ cup unsalted butter, at room temperature
2 eggs, at room temperature
1 cup skim milk
1 tsp vanilla extract
1 tsp ground cinnamon
3 oz bittersweet chocolate, melted and cooled
½ tsp salt
1 ½ tsp baking soda
2 cups sifted all-purpose flour

Directions:

Leave the starter out overnight.

Preheat the oven to 350. Cream together the butter and sugar till it's light and fluffy. Add in the eggs, and mix thoroughly. Stir in the milk, starter, vanilla, cinnamon and melted chocolate. At this point, beat the batter for a few minutes. Then sprinkle in the salt and baking soda. Finally, add the flour in slowly.

Pour into a prepared cupcake tin and bake for 20-25 minutes. Let the cupcakes cool for 5-10 minutes, then remove from pan and let cool completely. They'll be pretty soft, so be gentle.

Frost with your favorite frosting and enjoy!

April 1, 2010

Meringues (sometimes with coconut!)

I have never liked meringue. It was dry and crumbly, and stood between me and the best part of whatever pie it was sitting on top of. I hated the fact that it tasted like nothing. But a few months ago, my opinion changed. I had made something requiring egg yolks (I don't remember what), and had the whites left over. I hate wasting food, so I found a cookie recipe for the whites only and gave it a shot. Those cookies were ok, nothing to write about for sure. The roommates offered feedback, and wished for something...fluffier.

So I bit the bullet and made meringues. And I loved them. It was a complete shock. I think the key with these particular meringues is the chocolate. You don't need much cocoa powder because there aren't any other flavors to compete. They also come out nice and chewy. They dissolve in your mouth a bit, leaving a nice, robust chocolate flavor.

This particular batch was made for a passover Seder. My friend  hosted, and required a non-dairy desert. Since eggs aren't dairy, these would do. I thought about cake, but non-dairy, non-floured cake is hardly worth the effort.


Recipe

Ingredients:
3 egg whites, room temperature
3/8 tsp cream of tartar
3/4 c sugar
2-3 tablespoons cocoa powder
1 tsp vanilla

Directions:
Preheat the oven to 300.

In a stand mixer, beat egg whites until they are nice and frothy. Add in the cream of tartar and the vanilla, and continue beating.
Once they are stiff, add in the cocoa powder and the sugar a tablespoon at a time.
Beat the egg whites a lot; you want to go well past stiff. If you've ever made something like this, you make think you've over beaten the egg whites. Nonsense!
Drop the egg white batter onto a cookie sheet in one tablespoon increments. Bake them for 35-40 minutes.

You can do a lot with this basic recipe, like stir in chocolate chips or dried cranberries. For the Seder I made one plain batch, but we ate them all. So I made another batch with coconut.

March 19, 2010

Peanut Butter and Chocolate Bars

The damnable graham crackers strike again! I made these last week, before my approximation of pie. They were extremely delicious, and fattening in ways I'd prefer not to think about. In my quest to use all of the graham cracker crumbs, I might turn my roommates in to 300 pound bouncers. Which, for at least four of us, would significantly up our income, so I guess they shouldn't complain.

And the bananas in the background prove that we do keep healthy options around. I swear. It's not my fault if the folks passing through the house choose peanut butter and chocolate over bananas.

These bars require no baking. If I were ambitious, I'd temper the chocolate, but I don't see a reason to go through all that fuss with generic supermarket brand chocolate chips. So plain melting will do. Also, the original recipe called for a cup of butter, which I think is gross.


Peanut Butter and Chocolate Bars

Ingredients:
1 cup creamy peanut butter
1 1/3 cup powdered sugar
2 1/2 cups graham cracker crumbs
12 oz chocolate chips

Directions:
Heat up the peanut butter in the microwave, then stir in the sugar and graham crackers. The mix will be a bit crumbly. Spray a 9x13 pan with non stick spray, then press the peanut butter mix into it. Stick the whole shebang in the fridge while you do the next bit.

Place the chocolate chips in a microwave safe bowl, and melt them. It took mine a minute thirty, taking time out to stir and such so they didn't burn. Once it's mostly melted, take the chips out and keep stirring till it's nice and smooth. Take your peanut butter out of the fridge and pour the chocolate on top. You'll need to smooth it with a spatula. Chill them in the fridge for a few minutes, then cut them while they're still warm. This will save you frustration later, I swear.

The only suggestions I have are that 12 oz of chocolate chips really isn't enough. I'd suggest going for a full pound. It was noted that they were a wee bit dry, so some more peanut butter wouldn't be a bad idea.

And seriously, I'm stumped with the graham crackers. Anyone have any suggestions about how to defeat them? They sit on the counter, the everlasting 5 pounds of them, taunting me.

Knitting and sewing posts next week.

March 11, 2010

Garlic Soup

I saw this recipe several months ago, and was intrigued. Garlic has never been anything besides an added flavor to the main event. Roasted chicken with garlic, for instance. Or pasta sauce. Or roasted plain the way my friend makes it, submerged in olive oil.

But never as soup. So I bookmarked the recipe and promptly forgot about it. Months passed, I moved states, and I've been out of work since then. So I'm trying not to spend much money either. And I found myself home alone for dinner. That's when the garlic soup popped back into my mind. Seriously, this soup is cheap. So here's my version, the main difference being that I didn't have fresh sage. I also didn't bother with the straining. Mmm lazy.


Sorry the picture is lame; I was hungry.

Garlic Soup


Ingredients:

6 cups water
1 bay leaf
1/2 teaspoon dried ground sage
1/2 teaspoon dried thyme
12ish cloves garlic, peeled, shoots removed, and sliced
1 teaspoon salt

For the thickener:
1 egg
2 egg yolks
3 tablespoons grated Parmesan
pepper
1/4 cup olive oil

Directions:

Combine the water through salt in a pot and bring to a boil. Lower heat to medium low and simmer the soup for 45 minutes. It's done when the garlic crushes easily with your spoon.

While the soup simmers, separate two of the eggs and set the whites aside for something else (This is an excellent use for them). Whisk the egg yolks with the whole egg. Add in the Parmesan and the pepper and whisk again. Drizzle in the olive oil while whisking. That gets everything nice and solidly combined.

Now the fun part. When your soup is done simmering, remove some of the liquid (1/3 cup or so) and slowly pour it into the egg mix, whisking the whole time. This is called tempering eggs. You do it so the eggs don't scramble and get weird. Keep whisking and add more cooking liquid until the egg mix is nice and hot. Pour the egg mix into the soup, again whisking like crazy. Scrambled eggs in soup is actually quite delicious, but it's not what you're going for here.

Cook the soup over medium low for a few minutes, until it reaches the consistency of cream. Ladle into bowls and serve! I ate mine with whole grain bread.

March 8, 2010

Cucumber Salad

I could make this salad every day. As it is, I make it every week. It's easy! And we go through it fast enough. There's only 5 ingredients, and they're easy to get. Dousing the cucumber slices in salt lets them sweat out their liquid. They absorb the dressing so much better that way. You can add other vegetables, sliced thin, or different spices. I've used cider vinegar and lemon juice. Think of this as a guideline, not a recipe.


Cucumber Onion Salad

Ingredients:
1 seedless cucumber
1 onion, any type, though red are the prettiest
dried basil to taste
1 1/2 tbs red wine vinegar
3 tbs olive oil
pepper
Salt

Directions:
Thinly slice the cucumber and lay the slices out on paper towels. Liberally sprinkle salt on the cucumber slices and let them sit for an hour. While the cucumber is sweating, slice the onion and add it to your bowl. Dump in as much basil as you like- I usually use about a tablespoon. After an hour, blot your cucumbers with paper towels and add them to the bowl. Whisk the olive oil and vinegar and pour it over. Add pepper as desired. Let the whole thing sit in the fridge for at least 30 minutes.


Gratuitous close up.