December 21, 2010

Red Velvet Moon Pies

 Last night was a total Lunar eclipse. It was also the Winter Solstice, a day I look forward to mainly because from now on the days will get longer. My plan for the evening was to go to the Tulane parking deck to watch it. Even though it's brightly lit, the sky was still decently visible. Plus, I love the view up there. You can see clear to downtown, with the lights on the Crescent City Connection and the soft glow of the Superdome. My companions decided to stay in, but it was nice anyway. Very peaceful, at least. Just me, New Orleans, and the red Moon. It was even kind of warm.

But you see, I'd make these cookies in honor of the occasion, and now I had no one to share them with. There are few things better than sharing cookies, so I hightailed it out of there and headed to karaoke at Le Bon Temps (every Monday, if you live in New Orleans, you should go). My friend brought his telescope and set it up outside the bar. So I stood outside with him, his delightful girlfriend, and a bunch of drunks and watched the moon turn a watery red. The cookies were perfect. So was New Orleans, at least for a little bit.

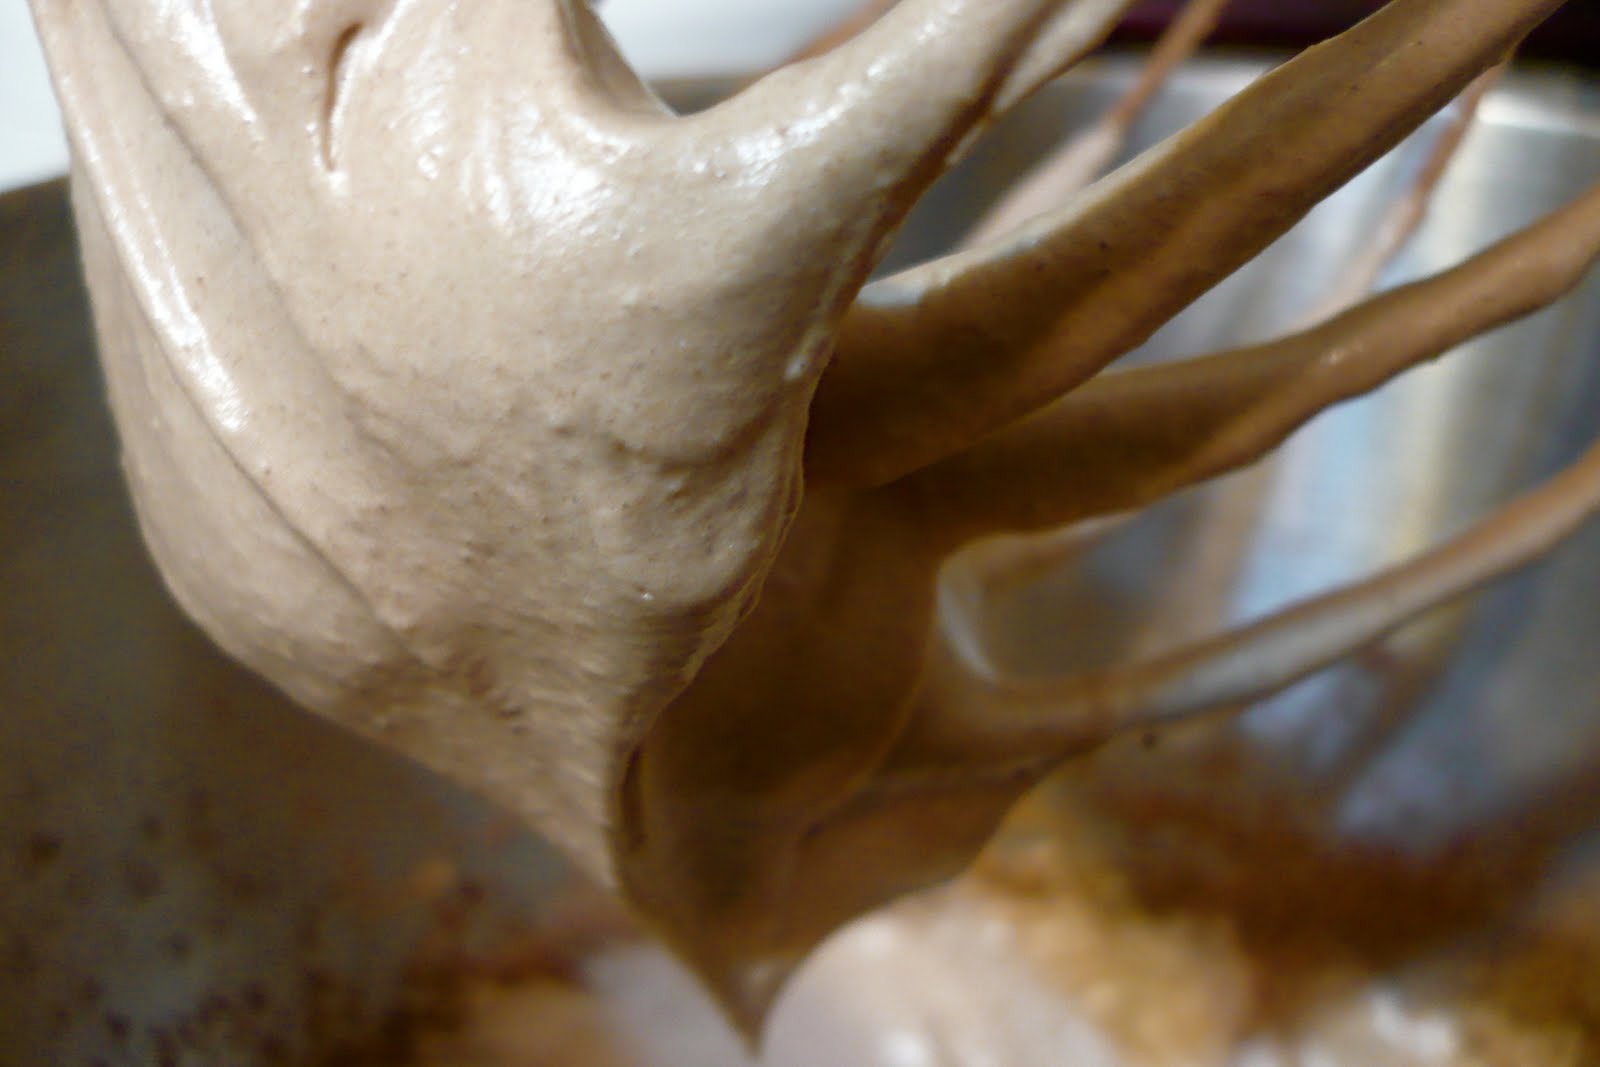
These are easy to make. The batter is pretty liquidy; it resembles cake batter rather than cookie dough. Don't doubt, just roll with it. (Edited to add that I got the recipe here, and only really tweaked the frosting.)

Ingredients:

1/4 cup butter, softened
1 cup sugar
2 eggs
2 tablespoons buttermilk (Or you can cheat and use plain milk and a splash of vinegar)
1 teaspoon vanilla extract
1 tablespoon red food coloring
1 1/3 cups all-purpose flour
4 tablespoons cocoa powder
1 teaspoon baking powder
1/4 teaspoon baking soda
1/2 teaspoon salt

Directions:

Preheat the oven to 375. Cream together the butter and sugar, then add in the eggs. Once it's all creamed nicely, add in the buttermilk, extract, and food coloring. Mix in the dry ingredients in batches, beating thoroughly after each addition.

Drop the batter by tablespoonfuls onto your cookie sheets. Bake for 10-12 minutes, or until the centers look set. Let cool on the sheets for a minute or two, then move to a rack. They might stick a bit; mine did.

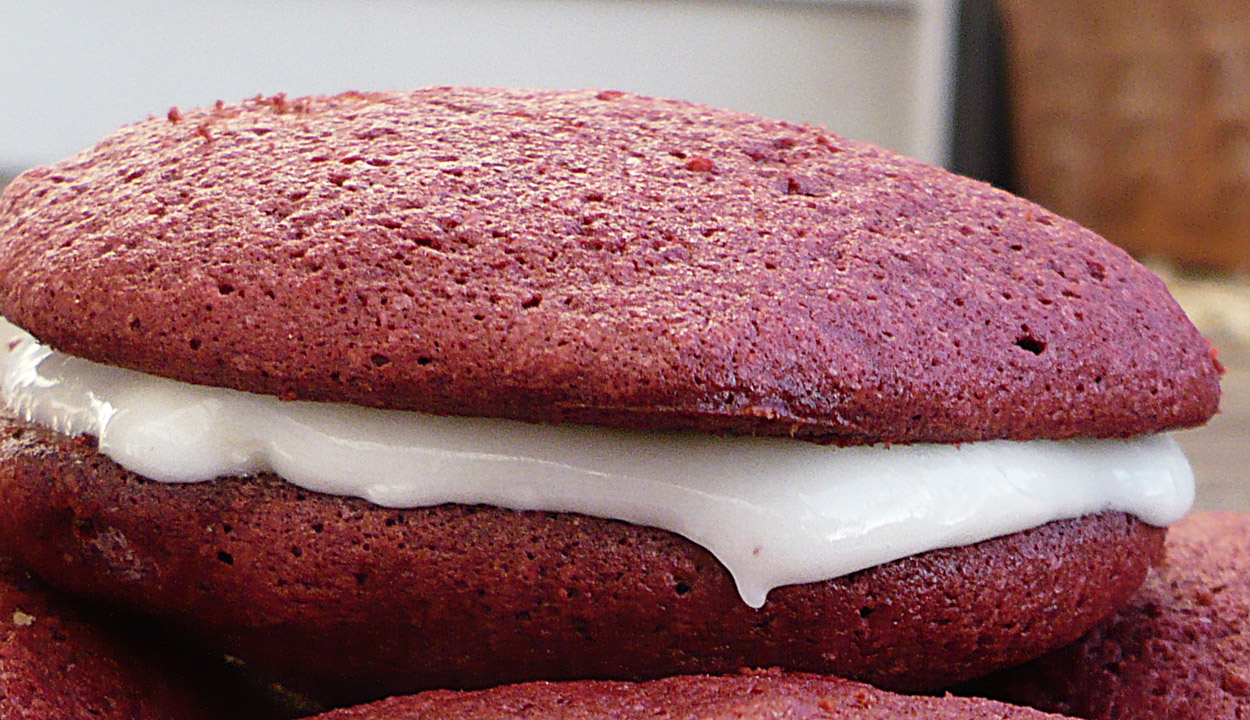
While your cookies are cooling, you should make the filling. It's cream cheese frosting. My approach is rather free-form. I'll adjust amounts until I get the right consistency, which in this case is slightly runny. Once you've made the frosting, smear 1 tablespoon (or enough to get a nice layer without it squelching out when you bite into it) of it on a cookie and then slap on another cookie. Sandwich made!

Ingredients:
8 oz cream cheese
1/4 cup butter
1 teaspoon vanilla extract
2ish teaspoons of milk
3 cups powdered sugar

Directions:
Beat together cream cheese and butter, then mix in vanilla. Start adding the powdered sugar bit by bit. Add in milk as needed to keep the frosting smooth. You can add more or less sugar as needed to get the right texture. I don't like really sweet frosting, so I play with the milk content instead. You're going to have a ton extra.

Makes 13ish sandwiches.

December 17, 2010

Linzer Cookies


I bake to relieve stress. This is almost certainly why I gained weight in grad school, but everyone else enjoyed the fruits of my labor, so it was worth it. I bring this up because today was not a good day. My Christmas/New Year's plans were dealt a setback by the Gentleman in Question's company. We've had to change a significant part of our trip to DC, and it was unclear for a bit how this would affect my flights. Several phone calls to the travel website later, and at least one crying fit (sometimes I regress to being a whiny teenager, deal with it), we got it worked out, hopefully for real.

So to deal with the frustration of dealing with online travel companies, I made Linzer Cookies. They are delicious and pretty! The darker ones got a bit overcooked because I was arguing with a travel man on the phone. You should make them. And hopefully while not arguing with customer service representatives.


Ingredients:
2  cups  all-purpose flour (about 9 ounces)
1/2  teaspoon  baking soda
1/4  teaspoon  salt
1/4  teaspoon  ground cinnamon
3/4  cup  granulated sugar
1/2  cup  butter, softened
1/4  cup  egg substitute
1/4  cup  seedless raspberry jam

Directions:
Cream together the butter and sugar. Mix in the egg substitute. Blend in the dry ingredients, adding them slowly. Divide the dough in half and wrap in plastic wrap, flattening it into a disk. Chill at least 1 hour.

Preheat oven to 375 and roll the dough out to 1/8-1/4" thickness. Using a jar or a pint glass, cut out round shapes. Using a smaller cookie cutter, cut out center shapes in half the disks. Re-roll scraps and cut more shapes, until there's none left. Bake for 10 minutes and let cool completely. Spread 1/2 teaspoon of jam on the whole cookies, and place the holey cookies on top, smushing together. Chill in the fridge and eat!

I got 12, but you could get more if you used smaller cutters.

December 13, 2010

The Sweater Curse

 All female knitters are told early in their learning process that they should never, ever, knit their boyfriend a sweater. Because if a female knitter were to make that mistake, said boyfriend would break up with her.

There are a multitude of theories regarding this phenomenon. All assume that the man in question does not like knitting. Or commitment. The most common, contemporary theory, argues that a handknit sweater is a symbol of love and devotion, given that it takes quite a while to make such an item. This potent symbol of regard and affection thus scares off the fickle man, who apparently wants a woman who's not that in to him. He never wears it, and it languishes in the closet as the woman stews over his ingratitude. He dumps her for her clingyness and moves on to a hipper girl.

Poppycock. Balderdash, I say! Why do we give men so little credit? Male knitters aren't told anything like this; there's no reverse sweater curse where your girlfriend leaves you crying over a pile of wool. Moreover, while obviously there are men who are afraid of lasting ties, there are just as many who would love to be with someone who loves them enough to wrangle with the wool.

No, I think there's more going on with the sweater curse phenomenon, and I have my own theory, developed during my year working in the yarn store. One of the most common customer complaints was that the recipients of these beautiful, lovingly crafted pieces, were completely ungrateful. I heard countless stories of daughters and daughters-in-law holding up the delicate white baby sweater and saying, "Oh, that's nice." Or the teen son looking at the new sweater his mother made with a sneer. Such an item could never be cool! What many of these knitters failed to account for was the personal taste of the recipient. Just as you don't buy a vegan a box of dry aged beef, you don't knit a lacy pink sweater for a baby girl whose mom is into death metal. In short, know your audience.

The fact of the matter is this: for many knitters, the effort that goes into a sweater is immense. You stretch your boundaries, try something new. You make mistakes and have to rip back. There's drama and personal growth! But no matter how much love you put in this sweater, it will never mean as much to the recipient as it means to you. If you are not prepared to accept that fact, then you should only knit for yourself.

He bought the yarn himself in Iceland.
However, if you are willing to forgo the surprise element, and knit something that you personally may not like, there is a way to knit successfully for others. The solution to this problem is to ask your intended recipient, no matter how close the relation, if they would like you to make something. And you must commit to not being offended if your intended recipient says no. Then, you make the recipient pick the yarn (or at least colors) and the pattern. The object becomes a collaboration, with a greater chance for success.

All of this to explain that I'm knitting the Gentleman in Question a sweater.

December 9, 2010

Peanut and Chocolate Chip Cookies

Here I present cookie #2 in my December cookie project. I realize they look a lot like cookie #1, but I assure you, they taste completely different. I gave half to Diana, and her response was to offer me anything I wanted in exchange for making her several batches...

They're easy to make. I used this recipe, with no alterations. The only thing I'd do differently is add more chocolate. Also, toasting the peanuts is completely essential. Mine were lightly salted; I'm not sure there are unsalted peanuts in stores anymore.


Ingredients:

1/4  cup  unsalted butter, softened
1/2  cup  granulated sugar
1/2  cup  packed brown sugar
1  teaspoon  vanilla extract
1  large egg
1  cup  all-purpose flour (about 4 1/2 ounces)
1/2  teaspoon  baking powder
1/4  teaspoon  baking soda
1/3  cup  semisweet chocolate chips
1/3  cup  coarsely chopped unsalted, dry-roasted peanuts
1/2  teaspoon  coarse sea salt

Directions:

Preheat the oven to 350, and toast the peanuts on a cookie sheet for 5 minutes. Cream together the butter and sugars, then add the vanilla and egg. Mix thoroughly, then add in the dry ingredients. Once it's all together, stir in the peanuts, chocolate, and extra salt. Drop by spoonfuls on the cookie sheets and bake for 10 minutes. Cool on a wire rack and try not to eat them all. Makes 24 cookies.

December 3, 2010

Cranberry Walnut Chocolate Chip Cookies

Another long pause, I know. I've been traveling a lot. However, I don't want this to turn into a blog about how I don't blog, so instead I'd like to tell you about my project for December: Christmas Cookies. I announced it on Facebook and got some excellent suggestions. A frenzy of googling followed. I found this recipe from Cooking Light and decided to make it, with some changes. These were made December 1st, and turned out pretty well. My friend ate the four I gave her in under a minute. 

A few notes: you should consider upping the cranberry content. They're delightful. The chocolate amount given is somewhat negligible. I'll leave it out next time, since we hardly noticed it.


Ingredients:
5 tablespoons  butter, softened
3/4 cup  packed brown sugar
2 tablespoons  honey
3/4 teaspoon  vanilla extract
2 eggs 1 1/2 cups whole wheat pastry flour
3/4 cup  regular oats
1/2 teaspoon  baking powder
1/4 teaspoon  baking soda
1/4 teaspoon  salt
1/4 cup  dried cranberries
2 1/2 tablespoons  finely chopped walnuts
2 1/2 tablespoons  semisweet chocolate minichips

Directions:
Cream together the butter and sugar. Once it's mixed, add honey, vanilla, and eggs. Mix thoroughly. Add in the rest of the ingredients, mixing well after each addition. (Yes, I know you're supposed to mix the dry stuff together first, and then beat into the butter stuff, but I don't have a dishwasher, and I had enough to wash as it was.) Cover bowl with plastic wrap and let dough rest in the refrigerator overnight.

Preheat oven to 350 degrees. Drop the dough onto the cookie sheet by tablespoon (you should get 36 smallish cookies), and bake for 10 minutes. Let them cool, and try not to eat them all at once.

November 6, 2010

Chore Wars!

So about a month ago, I finally moved into the new place. The unpacking has been slow, for many reasons. Turns out, I have a lot of stuff and not a lot of motivation. Which is why Dr. Funk brought up the delightful website/game of Chore Wars. The premise of the game is Dungeons and Dragons for your chores. Dr. Funk and I are in a party together; I'm a cleric, he's a barbarian. Our household chores are tasks and quests within the game, and they have a set experience point value and in-game currency value. And thus, Dr. Funk and I are now in direct competition with each other to get the most points and money. The side effect is that our house gets clean. It's been awesome!

September 16, 2010

New Hampshire Socks

I recently returned from a two week jaunt to visit the Gentleman in Question. It was an excellent time, including a weekend trip to Maine for whitewater rafting to celebrate our one year anniversary! That trip will get its own post in due time (waiting for the waterproof cheapo cameras to get developed). Today, I want to talk to you about socks.

This sock is made from Socks That Rock, in the color "Deck the Halls." I bought it at Webs, in Springfield, MA, while on my summer roadtrip. It languished in my ever growing and slightly embarrassing stash, and I threw it in my suitcase on a whim.

One of the less exciting parts of visiting the Gentleman in Question is that his job has a habit of eating souls, so I had the days to myself. I filled my days with job apps, Doctor Who, visiting grad schools, and knitting this sock. I decided that the multi color nature of the yarn required a more interesting sock, so I went with Outside In, a slightly unusual construction. In general, variegated yarns look more interesting on the purl side, otherwise known as the wrong side. The visual interest of the bumps breaks up any unwanted pooling or stripes.

I like this sock quite a bit. I made the medium size and it's a touch too big, but the small would be way too tight. And since I don't suffer from second sock syndrome, the partner to this one is on its way.

August 31, 2010

Heavenly Hash

I first heard about this cake from a coworker, and it sounded so good that I decided to make it to bring in to the office. I work for the census, and last Friday was the last day for a lot people, though not for me, and I wanted to do something special for it.

There were things to consider however. As described, the cake was a full sheet cake, and other cake eating instances in the office had shown me that cutting and serving cake could be difficult. In an office without a proper kitchen, the lack of real knives was definitely an obstacle. There was also the plate and fork issue. It seemed simplest to adapt the recipe to cupcakes, which would solve all of these problems in their single serving nature.

And so, I made cake. Heavenly Hash is chocolate cake, a layer of marshmallow, and a layer of dense frosting. While you can cheat and use cake mix for the cake, you can't cheat on the frosting. Canned frosting is only vaguely related to the real thing, and the real thing makes all the difference.

Ingredients:
1 box chocolate cake mix
1 1/3 cup coffee
1/2 cup oil
3 eggs
48 jumbo marshmallows
4 oz unsweetened chocolate
3 cups powdered sugar
1 stick butter
milk

Directions:
Preheat oven to 350 and line muffin tin with cupcake liners. Mix together the cake mix, coffee, oil, and eggs and beat until smooth. Put 1 to 2 tablespoons batter into the cupcake wells, or until they look about a third full. You want to leave room for the marshmallow and the frosting. Bake the cupcakes for 15-20 minutes. It's ok if they're a little underdone.

Remove the cupcakes from the oven, place marshmallow on each one, and put the tin back in the oven for 2 minutes. Remove again, and with a spoon, squish your marshmallows until they cover the cupcakes completely.

Mix up your frosting. Melt the chocolate and the butter together, then beat in the sugar, adding the milk as needed to smooth out the consistency. Top the cupcakes with the frosting, covering them as much as possible.


Note: Sorry about the blurry picture. My camera isn't that great and I'm thinking of getting a new one. Suggestions?

August 15, 2010

Pickles!

Pickles are a polarizing food. Lucky for me every eater currently in my life hates them. I love pickles unabashedly. I always have, ever since I was little. This is something that I share with my dad. I remember him making this sharp smelling concoction of white vinegar, onions, and radishes. He still makes it, though not as often as he did when I was little. I never ate it, since radishes frightened me. I still don't like them. But cucumber pickles, those I loved, in all their forms. Kosher, dill, bread and butter, spears, whole, chips, it doesn't matter. I will eat them.


Another pickle memory: my mom made my lunch for nearly all of my school years, and my lunch usually contained a double bagged dill spear. In high school I played volleyball, and I would come home from practice craving pickles. I'd eat a whole jar in a matter of minutes.

My ex-boyfriend's mother taught me how to make pickles one Easter season. The memory is vague, but I recall us using whole cucumbers packed into large mason jars. We boiled the vinegar, water, salt, and spices, including alum, then poured it over the cucumbers and popped on the jar tops. I don't remember processing them in any way; we just left them on the counter. It was a fun thing to do together. She also taught me how to drive a standard transmission, taking the ex and me out on the Arkansas back roads in an old Jeep Wrangler. I didn't stall out once.

It's a hazy web of memories and feelings, all brought on by pickles. I guess people get this way about things like cake, or cookies, or their grandmother's pot roast. And I love all those things too. But really good pickles make me feel like I'm small again sharing some with my dad.

This recipe makes two batches of pickles, each with its own flavor. The first is a white vinegar base, with a traditional dill seasoning. The second uses cider vinegar and sate seasoning because I was curious.

Ingredients:

2 English cucumbers, sliced and divided
5 whole cloves garlic
1 large shallot, sliced
2 fresh jalapenos, sliced
fresh dill
5 whole cloves garlic

Brine 1:
2 cups white vinegar
2 cups water
1 Tbs kosher salt, divided
1 Tbs pickle seasoning
1 Tbs dill seed

Brine 2:
2 cups apple cider vinegar
2 cups water
1 Tbs kosher salt
1 Tbs sate seasoning

Directions:

In a large saucepan, bring  white vinegar, cups water, and  salt to boil. Add pickling spices and dill.

Arrange the slices of one cucumber, 1 jalapeno, and 1 shallot in a glass bowl or your final container. Pour the boiling brine over the cucumber mix and let cool for one hour.


Repeat recipe with cider vinegar,  water, salt, and sate seasoning. Pour over the other cucumber slices. I added jalapeno to this batch too, removing the seeds to tame the heat a bit.

Taste your brine after it's cooled. If it's too salty, add cold water. The pickles will last about 10 days in the fridge.

August 8, 2010

Where I've Been, Part 2

When we last were recounting the events of last month, your heroines were in the pretty part of New Jersey. Alas, the Garden State was merely a way station, and on Saturday we left for the DC area. Elli and Dan graciously agreed to host us for the evening. I have done this drive many times. It's 3.5 to 4 hours. But not on Saturday. No, on Saturday Katie and I got to experience the aggravation of stupid Jersey drivers. After crawling along the Turnpike from exit 9 to 7, we discovered that the source of the backup was a lane shutdown. But only one lane, and only for 30 feet. 30 less feet of lane equals a 20 mile backup in New Jersey. By which point, we needed breaks, and rest. So the drive took more like 6 hours.

Somehow after arrival, there was the suggestion of going swimming in the apartment complex's pool. This was an excellent idea. We made a delicious stir fry (ok, Dan and Elli made it) and the Henz attended. Which was perfect, because I was able to unfurl MysteryProject, which shall hereafter by known as the Apron of Ridiculosity! It's awesome enough to get its own post. But not awesome enough for the overworked Henz to notice it. I laid it out on a chair which he was showering (the man was quite sweaty), and he spent a good 15 minutes ignoring it, much to mine and Dan's amusement.

The next day began the epic drive portion of the trip. The original plan was to drive to Cincinnati, where one of Katie's best friends lives. It was going to be an 8 hour trip. We set out, and I was reminded that Western Maryland is very pretty. Having never been to West Virginia before, I wasn't sure what to expect. Katie saw a road sign for a winery, and that was it. We got off the highway and drove the winding local roads to a vineyard on the slopes of a green and rolling valley. The parking was well below the winery itself, and there was some debate as to whether the fully loaded Mini could make it back up the steep incline. I'm glad we risked it. The Forks of Cheat Winery had an impressive selection of wines, all created on site. We tasted many, and talked to the general manager about their process. Katie bought 6 bottles, I bought one. Mine was pomegranate, and I'm extremely excited about it. The wine was sweet, a desert wine really, and honestly fruity. Apparently, it's one of the few pomegranate wines produced on the east coast, which convinced me to buy it. I have plans for the wine, and they involve some boiling into syrup.

Much driving later, we arrived in Cincinnati, only to discover that our host was delayed in another state. So we drove further to Katie's parent's house in Kentucky. The gps did not know of their street. Neither did Google, which is saying quite a lot considering Google knows all. It was 12:30 am, and we were close to our destination, when the gps decided that what we really needed was more horror in our lives. It suggested we turn left on a residential road. We did so, and the road quickly turned to gravel. In itself, that's not suggestive. Lots of rural places have gravel roads. Another block, and the road began to narrow. Then it curved off to the right, narrowing all the while. The grass and weeds grew higher, reaching over the poor Mini. As we rounded the next curve, we saw grass growing through the gravel shining in the headlights. I know we were both thinking it, but Katie was the first to say that the gps might be leading us into a horror movie. A three point turn and a phone call later, we were back on the non zombie apocalypse path.

And on the next day, there was bourbon. Four Roses, Heaven Hill, Maker's Mark. The tour at Maker's was my favorite. We tasted both the regular and their Mint Julep product (a bit too sweet). Four Roses was interesting, though their bourbon was much more sharp. They had three we could taste. The oldest was by far the smoothest, though still not my favorite. Heaven Hill was kind of a wash. We missed the short tour, the long tour was too long, and the trolley tour, which we took, wasn't very exciting.

After dinner at the Eastland Cafe in Nashville, I flew home to New Orleans to begin phase two of my time off: moving into a new house. Which isn't the least bit interesting, so I'll just say that it got done without too much drama.

August 2, 2010

I have not died.

You may be wondering where I've been. Or maybe not, my posting here has been pretty…irregular. The truth is that I haven't written because I haven't really made anything in the past month. Which isn't to say that I didn't do anything. The first, and perhaps most interesting thing I've done recently is that I went on a short roadtrip! But I didn't take my camera, so no photos for you!

My college roommate needed to drive from Boston to San Antonio, and definitely didn't want to do it herself. Her husband moved there in January for a job, and she was finally able to sell their place and join him. So I tagged along as entertainment. I could only take a week off of work, so my end point was Kentucky. She drives the cutest mini cooper!  And while I can drive a manual transmission, I'm certainly not good enough at it to even suggest driving her car. So my job was to navigate.

I arrived in Boston last Thursday morning and promptly took the bus to Framingham.  Katie had some last minute things to finish up with at work, so I walked to a bar across from the bus station and got a beer and watched some World Cup. It was pretty nice, I'm not going to lie. Katie arrived, and we left immediately for WEBS.

For the non-crafty types, WEBS is a yarn store. But not just any yarn store. It has among the widest selection I've ever seen! In addition to the major brands, they had a lot of smaller labels, spinning and weaving supplies, and a great atmosphere. But what really stands out is the warehouse. Behind the store, there is a medium size warehouse full of yarn. Full of it, all in bags! They provide shopping carts! You can just wander the aisles and rip the bags open when something strikes you. I admit, I was a little overwhelmed by all the choice, but I walked away with a skein of sock yarn.

The next day, we set out for New Jersey. First, we stopped at Down Cellar, where I worked for a year. They recently moved to an excellent location. They have a cute little house just up the street from the old shop. It has a lot more room, and the storage is fantastic. They even offer sewing instruction now! My craft senses were tingling. Tingling I tell you! It was great to see Kathy, Lureen, and Keri again. I miss the store and everyone there a lot. It's sad, but I haven't found that kind of craft community here in New Orleans yet. We spent the night with a friend of mine from grad school and had drinks with the Rutgers Art History crowd. The weather was nice, and it was a good night for beer.

June 17, 2010

Minestrone

Or as the roommate dubs it, Italian Trash Soup. The Funk noted that it could also be known as Jersey Shore soup. I think it's soup of people who are marginally employed, yet rich in the realm of frozen vegetables.

It's not the best minestrone I've ever had; that distinction belongs to my dad's college roommate, whose minestrone is a labor of love, taking hours, with carefully balanced proportions of vegetables.

But mine is ready in 30 minutes. So I win?


Ingredients:
4 cups stock
2 cups water
1 14 oz can tomato sauce
1 14 oz can diced tomatoes
10 oz sliced andouille sausage
1 lb dried black beans, soaked
garlic salt
black pepper
Italian seasoning
thyme
paprika
sage
tarragon
coriander
fennel seeds
1 onion, chopped
1 lb frozen peas
1/2 lb frozen corn
1/2 lb frozen green beans
1/2 lb frozen lima beans
1/2 lb short pasta

Directions:
Mix stock, water, tomato products, sausage, and onion together and bring to a boil. Add your spices to taste. Throw in the pasta and cook until just al dente. Then add in your frozen vegetables, and cook until they're ready.

Eat, enjoy, and avoid our mistake of drinking hobo wine at the same time. Which is a story for a different day. Suffice it to say, The Funk is no longer allowed to drink Mad Dog, Steel Reserve, or anything of that ilk in our house.

June 15, 2010

How to separate eggs without a separator.

Use the shells! It's not too hard.

Step 1: Crack the egg, holding one end higher than the other so none of the eggy stuff leaks out.

Step 2: Tip the yolk from one side of the shell to the other. The white should fall away into your bowl.

Step 3: Repeat, until only the yolk remains in your shell.

Done!

June 13, 2010

Kilt Hose

They're finished!  These socks were an odyssey, lasting nearly a year. Oh, how I labored. The wrenches are cabled, and of my own design. I designed these socks using these as a template and general sizing guide. There was much finagling and knitter's math involved. I'm thinking of writing it up and submitting it to one of the knitting journals. I'll need better pictures if I'm going to do that, so someone will have to volunteer to model! The Gentleman in Question dislikes having his picture taken. That is his leg, but that's the most you'll ever see of him.

The hose began their life as a flirtatious joke between myself and the Gentleman in Question. He arrived to the Fourth of July fireworks party wearing a Utilikilt. Now, I had seen such a thing before; I know several kilted men.  The gentleman, learning that I was a professional knitter at the time, commissioned a pair of kilt socks, as he was shortly moving to the cold and frozen north and wished to wear his kilt in the chillier weather. Being an engineer, he wanted wrenches instead of the traditional cabled panel.

So I researched. And discovered that no one had ever wanted to knit cabled wrenches before. Thus began a period of experimentation, whereupon I learned how to design a cable pattern. Much math and swatching latter, the socks were begun. There were snafus aplenty. And much anxiety! As previously mentioned, the Gentleman has skinny legs, whereas mine are more...generous.

There were holdups surrounding major life changes. I moved back to New Orleans, which was a production of its own, let me tell you. Then the holidays, plus housing drama. I worked slowly, but steadily. Finally, in March, they were finished! But tragically, they were not- the foot was too short! And so, feet reknit and lengthened, they were completed, and are in the hands of their rightful owner. Just in time for summer.

These socks mark major changes in my life. A new boyfriend, a major move, a career shift (if working in a yarn store and teaching can be considered a career), and all of the attendant drama. I'm still not settled, but with the completion of the socks, I feel that the next chapter is ready to begin.

So what should I make next?

June 1, 2010

Chicken Pot Pie


This was shockingly good. It was kind of soupy, but it thickened in the refrigerator. But the flavor was spot on, and I have no complaints. We ate this over the course of a week, and it just kept getting better!

Ingredients:
3 Chicken breasts
1 bag frozen peas
1 onion, chopped
3 cloves garlic, chopped
3 stalks celery, chopped
1/2 bag baby carrots
4 red potatoes, quartered
1 tablespoon olive oil
1 quart chicken stock
1/3 cup flour
1 large puff pastry
Rosemary
Thyme
Sage
Salt
Pepper

Directions:
Place breasts in a baking dish and bake at 350 degrees for 30 minutes. Meanwhile, chop the onion, celery, and carrots. Quarter the potatoes. In a large saucepan, heat the oil and add the onions, garlic, celery, and carrots. Cook, stirring frequently, until the onions are translucent. Add the chicken stock and spice to taste. Bring soup to a boil, and add the potatoes.

When the chicken is done, remove it from the pan and chop it up and set aside. Mix some of the hot chicken stock into the flour, creating a slurry. Mix that slurry back into the soup and stir to mix. Cook on high for 10 minutes total. Pour the soup into a 2 qt pyrex dish, then top with the puff pastry. Be sure to cut some slits in the pastry to vent the steam. Bake at 350 degrees for 30 minutes, or until the pastry is nice and brown.

May 29, 2010

What I've been up to

It's been a month, and I haven't written to y'all, for which I apologize. In my defense, there was overtime involved. My roommates weren't sure I still lived here; they only saw the remnants of my breakfast dishes. But I have been doing fun and crafty things in my slight spare time. I made this:

It's a cracked wheat bread. Verdict: extremely tasty with a fine crumb. But it's incredibly dense. Mine did not rise properly at all.


See what I mean about the nice crumb? It was sweet, but not too sweet, and perfect with what we in the house have termed to be failjam. Failjam was created by my roommate out of fresh Louisiana strawberries. For unknown reasons, it failed to set properly. But it's delicious. Seriously delicious. And when dripped on this, it was heavenly.


 I also made a schawarma roasted chicken. I love shawarma. I first ate it at Lebanon's here in New Orleans, and it remains one of my favorite things to eat in this city. They make a lentil soup that my mom is still talking about. I should go back and beg them for that recipe. As far as the chicken goes, I sprinkled the spices on the whole chicken, then coated it in the yogurt and tahini. It was the most moist roasted chicken I've ever eaten.


I leave you with this:

The master of ceremonies wearing part of my Luigi costume from Halloween. It amuses me greatly. I hope to have kilt hose to show you in the near future as well. I get to see the Gentleman in Question next weekend, where we'll have the final fitting.

May 2, 2010

Fake Girl Scout Cookies


Hello everyone! Where have I been, you ask? At work, of course. For 13 hours per day. I went in yesterday too. I was supposed to go in today, but there's only so much I can take. So on the one hand, money. On the other, I haven't posted in a while, and I made these cookies last week.

I love girl scout cookies. I love both Samoas and Thin Mints, though for different reasons. The Thin Mints are refreshing, while the Samoas are decadent and delightful. I only bought one box this year, which was a shame. The cookie sale is now over, so no more cookies for us. But then! My roommate found this recipe. So I decided to make them.

Verdict: they're a huge pain. Delicious, certainly. But a giant pain in the ass. Our kitchen is too hot to temper chocolate properly, and caramel is finicky like a two year old. I burnt the first batch of caramel and had to start over. I also can't seem to temper chocolate correctly. You're supposed to heat it to 120, cool it to 80, add some more chocolate, and heat it to 86. Here's my issue though: at 120, it's not all melted, and when you add the extra at 80, it never melts. I don't understand. I am doing it wrong, but I don't know where my mistake lies.

But whatever, they were still amazing, and the only drawback was that I had to keep them in the freezer. They were so delicious in fact that I forgot to take a picture of the finished cookie. Whoops.


Ingredients:

For the cookies:
1 large egg
1/2 teaspoon vanilla extract
1 3/4 cups all-purpose flour, plus more for dusting
3/4 cup powdered sugar
1/4 teaspoon fine salt
1/2 teaspoon baking powder
8 tablespoons unsalted butter (1 stick), chilled and cut into small pieces


For the caramel:
1 1/2 cups granulated sugar
6 tablespoons water
1/4 teaspoon fine salt
6 tablespoons heavy cream
1 1/2 teaspoons vanilla extract


For the chocolate and coconut:
1 pounds semisweet chocolate, separated into 1 (14-ounce) portion and 1 (2-ounce) portion
1 1/2 7oz bag sweetened, flaked coconut, toasted


Directions:

Make the cookie base first. Mix together the egg and vanilla and set aside. Mix together the flour, sugar, salt, and baking powder. Using a pastry blender, cut in 1 stick of butter. It works best if it's cold, and you'll have to work at it for a while. Build some muscle! Pour in the egg and vanilla, and mix it up with the flour. Your hands work best. Once it's all combined, flatten your dough into a disk and refrigerate for at least an hour.

Preheat the oven to 375. Roll out the dough (I used a pint glass for this.) to 1/8" thick, then put it in the freezer so it can get hard again. Once it's firm, remove it, and cut out 2" circular cookies. I used a Jäger shot glass for this. Then use a smaller circular cookie cutter to cut out the centers. I had do to it freehand with a knife. Bake the cookies for 10-12 minutes. About 30 fit onto a sheet; they don't spread.


Once the cookies are out of the oven, spread the coconut on the cookie sheet and toast for 10, minutes, stirring once or twice. Turn off your oven and go do something else while the cookies and coconut cool.


Now, it's time for caramel. The original recipe didn't call for a thermometer, so I didn't use one. Mix together the sugar, water, and salt in a small saucepan. Bring it to boil over medium heat, stirring once. Boil for a further 15-20 minutes, swirling the pan occasionally. Don't stir! Once it turns the color of caramel, remove it from the heat and pour in the cream and vanilla. It'll sizzle a lot. Stir until it's smooth and pour into a heat proof bowl. Now go do something else. You can make the cookies and caramel at the same time, then take your break.

Once your caramel is cool enough that you can stick your finger in it without burning yourself, you can temper your chocolate. Using a double boiler, melt 14 oz. of chocolate to 120 degrees. Remove the chocolate from the heat and use an ice bath to cool it to 80 degrees. Put it back over the water, which should be at a simmer, add in the other 2 oz, and heat to 86 degrees.

Time to assemble the cookies! Dip the cookie bottoms in chocolate, then cool them in the fridge or freezer. Dip the cookie tops in the caramel, then in the coconut. Cool them again. Take the remaining chocolate and drizzle it over the cookies. Cool them again, and you're done!

Like I said, these were a pain to make but delicious to eat. They lasted less than 24 hours. One of my coworkers offered me money to make another batch and give them all to her. When I get my life back, I will!

April 21, 2010

Being Responsible is Not Much Fun.

I'm kind of failing this whole craft/food blog thing. And that's because I got a job. The trade off is that now I have money to pay for the craft habit, but I have much less time to indulge in crafting. I know, I should go eat some cheese with my whine, but such is life.

This isn't to say that I haven't been making things. I have! I started working on a case for the hookah the Gentleman in Question and I made, but discovered that I don't really possess the skills to make it. That whole endeavor was permeated with failure. My fatal mistake was trying to make a mock up with stiff paper. I'll try muslin next. But there was much swearing at the sewing machine.

I also made faux Girl Scout cookies. I have no pictures because it was labor intensive and required both hands. If I'd had a third, it would have been perfect. First, you make the sugar/shortbready cookie. Then you top it with peanut butter and sugar. Then you dip the whole shebang in melted and tempered chocolate. Tempering chocolate in our kitchen is incredibly difficult. I need a better thermometer. And a colder kitchen. The temper wasn't perfect, but it was good enough for the office.

So I brought them into work, and got decidedly mixed reviews. Apparently, the people I work with are sugar fiends. I used semisweet chocolate, and the main complaint was that the chocolate was too bitter. My baking style does not match with the office at all. I've never used milk chocolate as a baking ingredient in my life! And I certainly don't think of semisweet chocolate as bitter. These folk should taste the 54% chocolate I have hanging out in my cabinet. It's super bitter. I'm supposed to make fake Samoas this weekend. Those are even more labor intensive, so a roommate is definitely going to have to help. And while I think they'll be delicious, I'm not thrilled with the fact that my office mates won't like them.

The theme of this past week: under-appreciation of homemade things, and also failure at creating them. The bright spot: I got my Netflix for Wii disk in the mail, so I should be getting some more knitting time in. And there will be pictures.

April 15, 2010

Chocolate Sourdough Cupcakes


It's been a while since I worked 40 hours a week. It's been very easy to come home, sit down, and not move again until bedtime. I've tried to be social, and so far succeeded, but the morning after I inevitably oversleep and have to rush off to work again. My crafting time has seriously dwindled.

And that's my own fault. So, I resolve to make more stuff. In that vein, I present cupcakes. These were made with a purpose in mind. My roommate goes to a weekly potluck/supper club, and offered our house to host it. I decided that my contribution to the evening would be cupcakes, since I only had two hours between work and the start of the event. I'd seen a sourdough chocolate cake recipe and was intrigued, but rejected that particular iteration because it seemed awfully liquidy. But the concept stuck, and a quick Google search yielded this recipe. I didn't make many changes, and the first one was borne of procrastination. You're supposed to leave the starter out for 12 hours or so. Mine sat out for 2 days before I made the cake the day of the potluck.

Sourdough Chocolate Cupcakes

Ingredients:

1 cup thick sourdough starter
1 cup sugar
½ cup unsalted butter, at room temperature
2 eggs, at room temperature
1 cup skim milk
1 tsp vanilla extract
1 tsp ground cinnamon
3 oz bittersweet chocolate, melted and cooled
½ tsp salt
1 ½ tsp baking soda
2 cups sifted all-purpose flour

Directions:

Leave the starter out overnight.

Preheat the oven to 350. Cream together the butter and sugar till it's light and fluffy. Add in the eggs, and mix thoroughly. Stir in the milk, starter, vanilla, cinnamon and melted chocolate. At this point, beat the batter for a few minutes. Then sprinkle in the salt and baking soda. Finally, add the flour in slowly.

Pour into a prepared cupcake tin and bake for 20-25 minutes. Let the cupcakes cool for 5-10 minutes, then remove from pan and let cool completely. They'll be pretty soft, so be gentle.

Frost with your favorite frosting and enjoy!

April 9, 2010

A real strawberry pie


I came home from work on Wednesday, and was delighted to discover that my roommate had cooked. Now I understand a bit of what it was like to be a 1950s husband. It was wonderous! The food was tasty and delicious.

But I'm here today to talk to you about the pie. He made strawberry pie, using berries he'd picked up at the farmer's market. Unlike my pie approximation, his was truly a pie, and even used some of the damnable graham crackers! (Yes, they persist. No, I don't want to talk about it)

I have no recipe to share, just a pretty picture of pie, one that was much more coherent than my own. Oh, and for the record, I'm team cake.

April 5, 2010

Setback!

Well, the Gentleman in Question came to visit this past weekend. We had a lovely time! There was much eating. I highly recommend Jaques-Imo's, Camellia Grill, and Cafe Freret. The last is where we had Easter Brunch. A tasty, laid back brunch I might add. Crafty plans were hatched, which you'll get to see as they unfold.

But, the setback. The kilt hose are too short in the foot. I will have to unravel and lengthen them. I'm disappointed, because I wanted to send them home with the Gentleman. But, they require more work. I have a job now, so production may be slowed.

April 1, 2010

Meringues (sometimes with coconut!)

I have never liked meringue. It was dry and crumbly, and stood between me and the best part of whatever pie it was sitting on top of. I hated the fact that it tasted like nothing. But a few months ago, my opinion changed. I had made something requiring egg yolks (I don't remember what), and had the whites left over. I hate wasting food, so I found a cookie recipe for the whites only and gave it a shot. Those cookies were ok, nothing to write about for sure. The roommates offered feedback, and wished for something...fluffier.

So I bit the bullet and made meringues. And I loved them. It was a complete shock. I think the key with these particular meringues is the chocolate. You don't need much cocoa powder because there aren't any other flavors to compete. They also come out nice and chewy. They dissolve in your mouth a bit, leaving a nice, robust chocolate flavor.

This particular batch was made for a passover Seder. My friend  hosted, and required a non-dairy desert. Since eggs aren't dairy, these would do. I thought about cake, but non-dairy, non-floured cake is hardly worth the effort.


Recipe

Ingredients:
3 egg whites, room temperature
3/8 tsp cream of tartar
3/4 c sugar
2-3 tablespoons cocoa powder
1 tsp vanilla

Directions:
Preheat the oven to 300.

In a stand mixer, beat egg whites until they are nice and frothy. Add in the cream of tartar and the vanilla, and continue beating.
Once they are stiff, add in the cocoa powder and the sugar a tablespoon at a time.
Beat the egg whites a lot; you want to go well past stiff. If you've ever made something like this, you make think you've over beaten the egg whites. Nonsense!
Drop the egg white batter onto a cookie sheet in one tablespoon increments. Bake them for 35-40 minutes.

You can do a lot with this basic recipe, like stir in chocolate chips or dried cranberries. For the Seder I made one plain batch, but we ate them all. So I made another batch with coconut.

March 29, 2010

Project Updates

Well, the Mystery Project is basically complete. I have some cleanup to do, but then it'll be ready to send out. Overall, I'm pleased with it. There were a few missteps (I sewed a part of it upside down.), but I feel ok about giving it to an actual person. Once its intended receives it, I'll post full pictures and a rundown.

As a part of the mystery project, I learned how to make button holes. This is an exciting development! I also learned how to use the machine to sew on buttons, promising a future in which my buttons don't pop off and run away at the most inopportune moments.


The Nerdy Kilt Hose are trucking along. I seem to have rallied on that project. I attribute this to two things. Thing the first: I was five episodes behind on the latest season on Lost. So last night I did battle with my router and managed, with much swearing and much knitting, to watch three episodes. Since tv is prime knitting time for me, I got a lot done. Thing the second: the Gentleman in Question is visiting this Friday, and I want these to be done in time. The router seems to be behaving itself today, so we'll see how far I get.

March 25, 2010

Comments Policy

Hello all! My family has noted that commenting here is confusing. In response, I've set the comments to the lowest threshold, which allows anonymous comments. Basically, that means y'all can comment without having to register. I figure at this point I'm not big enough to attract spam. But since anyone can comment, I think it's best to spell out the basic rules.

No spam! I don't care about your Viagra or anything else like that, so don't waste my time. Spam will be deleted mercilessly.

No trolling! If you troll here (defined as being obnoxious for the hell of it), I'll disemvowel you. I don't care if you're related to me, you still have to be respectful to people. Mocking me is generally acceptable. Y'all mock me in person, so I don't see any reason to stop online. Just try not to make me cry, ok?

That should cover it. The internet is unpredictable, so I'll take it as I go and see what works. Follow the philosophy of Bill and Ted ("Be excellent to each other."), and we should be good.

The Nerdiest Kilt Hose Ever

The never ending socks. Last year during the fourth of July, I was asked to make the nerdiest kilt hose ever. And that's pretty nerdy, considering kilt hose are by definition geeky. The gentleman in question wanted his kilt socks to have wrenches on them, to reflect his engineering nature.

Have you ever tried to find a cable pattern for wrenches? I have. They don't exist, so I had to make my own. Last August, I bought the yarn and began the process of making kilt socks. I've sort of adapted a pattern, but in all honesty, I'm mostly winging it. I'm doing them two at a time on circular needles so I can be sure they turn out the same.

The project has been fraught. There were a few false starts, and more than a little anxiety. The latest worry eating at me is that they are too tight. They aren't of course. This worry stems from the fact that the gentleman in question has skinny legs, while I have been gifted with the mighty calves. They don't fit me, and so, I am anxious.

Why have they taken so long? I blame it in television. Or the lack thereof. We don't have tv in our house because we don't feel like paying for it, and everything we want to watch can be streamed to the tv through one of the house craptops. This saves us money, and makes us watch less tv. Awesome, right? Except that tv watching was prime knitting time for me. I've never been one to just sit and knit; there was always something else going on as well. So now that I have more of a life, I knit much less. Meaning the socks trudge along, not being finished.

There is also the latest setback. I did some plane knitting earlier this week. I'm planning for these to have a flap heel. Somewhere over New Jersey I made the flap, and when it came time to turn the heel over Virginia, instead of turning, I just made another short row heel entirely. My socks now have two heels, nicely executed, stacked one right on top of another. Needless to say, I need to rip out and try not to be such an idiot.

March 19, 2010

Peanut Butter and Chocolate Bars

The damnable graham crackers strike again! I made these last week, before my approximation of pie. They were extremely delicious, and fattening in ways I'd prefer not to think about. In my quest to use all of the graham cracker crumbs, I might turn my roommates in to 300 pound bouncers. Which, for at least four of us, would significantly up our income, so I guess they shouldn't complain.

And the bananas in the background prove that we do keep healthy options around. I swear. It's not my fault if the folks passing through the house choose peanut butter and chocolate over bananas.

These bars require no baking. If I were ambitious, I'd temper the chocolate, but I don't see a reason to go through all that fuss with generic supermarket brand chocolate chips. So plain melting will do. Also, the original recipe called for a cup of butter, which I think is gross.


Peanut Butter and Chocolate Bars

Ingredients:
1 cup creamy peanut butter
1 1/3 cup powdered sugar
2 1/2 cups graham cracker crumbs
12 oz chocolate chips

Directions:
Heat up the peanut butter in the microwave, then stir in the sugar and graham crackers. The mix will be a bit crumbly. Spray a 9x13 pan with non stick spray, then press the peanut butter mix into it. Stick the whole shebang in the fridge while you do the next bit.

Place the chocolate chips in a microwave safe bowl, and melt them. It took mine a minute thirty, taking time out to stir and such so they didn't burn. Once it's mostly melted, take the chips out and keep stirring till it's nice and smooth. Take your peanut butter out of the fridge and pour the chocolate on top. You'll need to smooth it with a spatula. Chill them in the fridge for a few minutes, then cut them while they're still warm. This will save you frustration later, I swear.

The only suggestions I have are that 12 oz of chocolate chips really isn't enough. I'd suggest going for a full pound. It was noted that they were a wee bit dry, so some more peanut butter wouldn't be a bad idea.

And seriously, I'm stumped with the graham crackers. Anyone have any suggestions about how to defeat them? They sit on the counter, the everlasting 5 pounds of them, taunting me.

Knitting and sewing posts next week.

March 14, 2010

Pi Day

Yesterday was Pi Day! This means I had to make pie. Fact #1: strawberries are in season here, so I decided to make strawberry pie. Fact 2: the damnable graham crackers remain. I swear they're like tribbles. With these two facts, I found a recipe. But once again, I had to make substitutions due to laziness and lack of supplies.

Like most houses, our kitchen has cabinets that go up to the ceiling. I wish architects were more aware of the fact that Americans are getting shorter. Because of my shortness relative to the cabinets, I substituted brown sugar for white sugar. The brown sugar goes in the pantry next to the fridge. A nice, easy to reach place. The white sugar goes with the flour on the top shelf of the cabinet next to the stove. I have to bust out the ladder to get to it! This makes no sense. Both of the bakers in this house are short. And yet, the flours and the sugar live out of reach. There is only so much effort I'll put into making crust with the damnable graham crackers, so brown sugar became the order of the day.

The second substitution came from the fact that we are out of butter. Now, I was already planning on going to the grocery store to buy strawberries, so the sensible thing to do would be to hold off and buy butter too. But no, in addition to being somewhat lazy, I'm also a tad impatient. So I improvised. We had two tubs of butter substitute in the fridge. I'm deeply suspicious of that stuff. But it was that or wait and buy butter. So I opened tub #1 and discovered a new genus of mold. It was red. Into the trash it went! Tub #2 was acceptably artificial.

Of course, this was all silly, because once there was crust, I went to the store and bought strawberries. And forgot to buy butter. And later, while making the filling, I used the ladder to get the hidden sugar, making the brown sugar even more ridiculous. So perhaps I should rechristen this desert Ridiculous Pie. In my defense, it was Sunday.

Ridiculous Strawberry Pie
Ingredients:
1 1/3 cup graham cracker crumbs
3 tablespoons butter, melted (don't be like me; use the real stuff)
2 tablespoons brown sugar
cooking spray
2 cups sliced strawberries
2 tablespoons balsamic vinegar
1/4 cup sugar
2 tablespoons water
1 tablespoon cornstarch
1 tablespoon lemon juice1 quart container of strawberries.

4 tablespoons graham cracker crumbs
1 1/2 teaspoons brown sugar
1 1/2 teaspoons butter, melted

Directions:Preheat the oven to 350 degrees. Then you should make the crust by combing the graham crackers, sugar, and butter. Mix it with a fork, then dump it into a pie pan that you've liberally sprayed down. Pat the crumb mixture into place. Bake it for 15 minutes, and then let it cool completely. Might be time to go to the store.


To make the filling, combine the strawberries and vinegar in a pot and cook over medium high heat for 3 minutes. Stir in the sugar, then make a slurry with the cornstarch and the water and stir that in too. Bring the mix to a boil and let it boil for a full minute. Remove from heat and stir in the lemon juice. Set the pot aside and let it cool.


While your filling is cooling, hull and wash the rest of the strawberries. Place them in the pie shell, flat side down. Once your filling is cool, pour it over the strawberries and prod it into place. Mine looked pretty anemic at this point, but whatever, it's still good.

Stick the pie in the fridge for 4 hours. At the end of those 4 hours, pull it out of the fridge and make the topping. Melt the butter and mix with the graham crumbs and sugar. Sprinkle it over the pie, filling in any holes in your filling. Then serve your pie!

Recommendations: The fake butter isn't the end of the world, but the real stuff would be better. The original recipe also calls for chopped nuts in the topping, but I forgot to buy those too. I bet they'd be good. My filling was rather thick; in the future I'll use 1/2 a tablespoon instead.


Also, I need to be honest and admit that this was more of a pi(e) approximation. It ended up more like a cobbler. It's still pretty good, and it used up some of the damnable graham crackers.

March 11, 2010

Garlic Soup

I saw this recipe several months ago, and was intrigued. Garlic has never been anything besides an added flavor to the main event. Roasted chicken with garlic, for instance. Or pasta sauce. Or roasted plain the way my friend makes it, submerged in olive oil.

But never as soup. So I bookmarked the recipe and promptly forgot about it. Months passed, I moved states, and I've been out of work since then. So I'm trying not to spend much money either. And I found myself home alone for dinner. That's when the garlic soup popped back into my mind. Seriously, this soup is cheap. So here's my version, the main difference being that I didn't have fresh sage. I also didn't bother with the straining. Mmm lazy.


Sorry the picture is lame; I was hungry.

Garlic Soup


Ingredients:

6 cups water
1 bay leaf
1/2 teaspoon dried ground sage
1/2 teaspoon dried thyme
12ish cloves garlic, peeled, shoots removed, and sliced
1 teaspoon salt

For the thickener:
1 egg
2 egg yolks
3 tablespoons grated Parmesan
pepper
1/4 cup olive oil

Directions:

Combine the water through salt in a pot and bring to a boil. Lower heat to medium low and simmer the soup for 45 minutes. It's done when the garlic crushes easily with your spoon.

While the soup simmers, separate two of the eggs and set the whites aside for something else (This is an excellent use for them). Whisk the egg yolks with the whole egg. Add in the Parmesan and the pepper and whisk again. Drizzle in the olive oil while whisking. That gets everything nice and solidly combined.

Now the fun part. When your soup is done simmering, remove some of the liquid (1/3 cup or so) and slowly pour it into the egg mix, whisking the whole time. This is called tempering eggs. You do it so the eggs don't scramble and get weird. Keep whisking and add more cooking liquid until the egg mix is nice and hot. Pour the egg mix into the soup, again whisking like crazy. Scrambled eggs in soup is actually quite delicious, but it's not what you're going for here.

Cook the soup over medium low for a few minutes, until it reaches the consistency of cream. Ladle into bowls and serve! I ate mine with whole grain bread.

March 10, 2010

Mystery Project

I'm working on something special. It's a present for a friend who will remain nameless for now. As you can see above, it involves a lot of ripping out and starting over. This is because my sewing skills are...woefully undeveloped.


Nevertheless, I made good progress today. I completed 2 more steps in the process. As you can see, it involved pinning things and sewing them. I had to rip out several times, which was irritating. But since this is for someone else, I need it to be good. Until I finish this object and give it to the intended, I can't say or show you more. So let this pique your curiosity for now.

March 8, 2010

Cucumber Salad

I could make this salad every day. As it is, I make it every week. It's easy! And we go through it fast enough. There's only 5 ingredients, and they're easy to get. Dousing the cucumber slices in salt lets them sweat out their liquid. They absorb the dressing so much better that way. You can add other vegetables, sliced thin, or different spices. I've used cider vinegar and lemon juice. Think of this as a guideline, not a recipe.


Cucumber Onion Salad

Ingredients:
1 seedless cucumber
1 onion, any type, though red are the prettiest
dried basil to taste
1 1/2 tbs red wine vinegar
3 tbs olive oil
pepper
Salt

Directions:
Thinly slice the cucumber and lay the slices out on paper towels. Liberally sprinkle salt on the cucumber slices and let them sit for an hour. While the cucumber is sweating, slice the onion and add it to your bowl. Dump in as much basil as you like- I usually use about a tablespoon. After an hour, blot your cucumbers with paper towels and add them to the bowl. Whisk the olive oil and vinegar and pour it over. Add pepper as desired. Let the whole thing sit in the fridge for at least 30 minutes.


Gratuitous close up.

March 5, 2010

Lombardi Gras

I first moved to New Orleans in 2002 for school. Have you ever gone to a place and been struck with the feeling that you belonged there? That's what New Orleans felt like to me. But like most college kids, I didn't get all that involved with life outside of college and college bars. Function of the age I guess. In any case, I didn't care in the least about the Saints.

That changed for me after the storm. I moved to New Jersey for graduate school in 2006. It was lonelier than I expected, and I was surprised at how much I missed New Orleans. So even though I wasn't a huge football fan, I bought a six pack of Abita and sat down to watch the Saints play the first game in the dome. And it was amazing. From beginning to end. That's when I became a fan. Saints games were impossible to see in Jersey, so I watched the Giants. I'm not an expert; most football fans would call me a dilettante. But whatever, I watch the games and I enjoy them, so the armchair pundits can go mock somebody else.

Since then, I watched the Giants win the Superbowl. I can state from experience that fans in other places are kind of lackluster in comparison to the Who Dats. The ticker tape parade for the Giants was kind of cool, but not awesome enough to cancel school. And as an aside, after living in New Orleans, parades in other places aren't that interesting. No one throws you anything! In high school when I lived in Baltimore and the Ravens won the Superbowl, there wasn't nearly the level of excitement.

The night of the game, I went down to a neighborhood bar in the Bywater with my roommate and some friends. We sat and drank beer, and I brought my knitting since we joined our friends at the bar 2 hours before kickoff. The game was close, and emotions ran high. In those final moments, when it became clear that we won, the whole city erupted. I've never heard such noise. Cars honking in the streets, spontaneous jazz bands, people shouting, the whole works. We, along with everyone else, left the bar and walked to the French Quarter. Bourbon Street (a place I avoid) had Mardi Gras level crowds. Thing was, everyone was happy. The folk in this photo were hula hooping for joy. There wasn't much shoving, people were dressed up, and everyone was smiling. I was there. People hitchhiked in and brought their babies.

But what of the sock? The sock is a long term project. I began it last summer in New Jersey. It languished in my knitting bag, ignored for more interesting and complicated works. Technically, it's a Harry Potter sock. The yarn is German, Harry Potter branded. So JK Rowling is making money off my knitting. The sock got shoved in my bag in the post game euphoria, and it stayed there for a while. It came with me to the Saints Parade. I stood on Canal street with eight hundred thousand other people and saw Sean Payton fist pump the Vince Lombardi trophy. And the sock was there with me.

So now it's a Saints sock.